How to Strike an Arc with a MIG Welder – 2 Simple Methods
I can remember the first time I switched on a welder and picked up the welding gun to make my first weld. My hands shook as I pointed the nozzle down towards the metal and then I slowly squeezed the trigger.
Suddenly a sharp blast of sparks exploded from the end of the welding gun as I quickly released the trigger. As I looked down at the metal I realized I had made an arc for the first time with a welder but it wasn’t very pretty.
The metal resembled nothing more than a bunch a spatter and if this is your first time welding you may have this same feeling.
So how do you strike an arc with a MIG welder? You can strike an arc with a MIG using 2 different methods, scratching and striking also known as tapping. Scratching is a common way to start a TIG weld. Striking or tapping is the most common way to start a MIG weld which works similarly to striking a match.
Unfortunately, a lot of beginners have a difficult time getting an arc to strike and stay consistent. This article will teach you what you need to do to be able to strike an arc with your MIG welder the right way.
What preparation do you need to do before you weld?
Before you can begin welding, you will need to make sure that you’ve gotten all the right safety equipment.
#1 Safety Equipment
You need to protect your ears from stray sparks and your eyes from flash and brightness using earmuffs and darkening helmets.
You also want to make sure that you’re wearing safe clothing that is resistant to flame. Leather welders’ aprons are very popular options.
#2 Prepare Your Workspace

You also need to prepare your workspace.
Make sure that everything is clean and free of rust, dust, or other flammable materials that may end up contaminating your weld or causing potential danger as you work in an area with very hot molten metal and sparks of electricity.
#3 Prepare the Metal
Next, prepare your base metal. You need to grind it or sand it down to make sure that you remove all coatings, paint, sealing, and rust from the base metal.
Use a special cleaner to remove any oil and grease from the surface, too. This process should involve grinding, wiping, using a safe solvent to remove oils, then wiping again until your metal is perfectly clean.
#4 Check Your Welders Settings
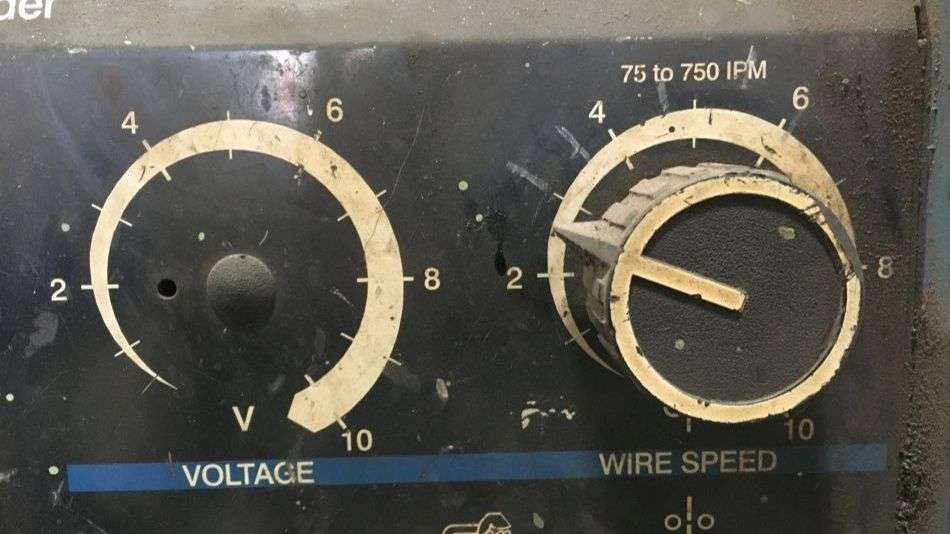
Last, you will want to adjust your settings on the MIG welder. There are a lot of chars that will guide you, and your MIG welder itself should have recommended settings somewhere on the panel or in the user manual.
This will ensure that you’re using the right voltage, amperage, power source, drive rolls, speed settings, wire feed, and other settings for the material you are using.
Be mindful of both your base metal and the wire feed metal and size, and keep some spare consumables on hand.
How to Strike an Arc with a MIG Welder – What is the exact process for striking an arc with a MIG welder?
Welding arcs are essential to good welds. That’s why every welder needs to know how to strike an arc and keep the correct arc steady and established.
This process needs to happen quickly, and maintaining it happens when your current is forced to flow through a gap between your base metal and electrode tip.
There are a couple of different methods for striking an arc. One is called scratching, and the other method is tapping. Both are effective, so it comes down to your welding style, your capabilities given the position you need to work from, and your technique.
Scratching is much easier, so it is highly recommended that anyone new to welding use the scratching method to weld. For this, you will need to be using a TIG welder but I’ve also seen this done with a MIG Welder.
Tapping involves moving your electrode across your base metal at an angle of incline. This works very similarly to striking a match. When your electrode scratches across the surface of your plate metal, you strike the arc.
Once it has fully formed, you can pull your electrode away for a second so you can form a longer arc. Then, you will want to return to a normal-sized arc length to resume your work.
When you use the tapping method to strike your arc, your electrode gets moved down to your base metal.
This will be a vertical motion. When your wire touches the base metal, you need to withdraw it again and form a longer arc than you desire, then return it to the normal arc length.
One thing that makes striking an arc pretty difficult to manage is when the arc freezes. This “freezing” process happens when your electrode sticks to your work.
Think of the fusion as the same sort of bond that happens when an unwitting child sticks their tongue to a flag pole in icy weather.
It’s an apt metaphor because it’s caused when your current actually melts your electrode tip, fusing it to the base metal before you can withdraw it.
When this happens, it forms an excessively high current. This will end up overheating your electrode and melting the electrode and the flux unless you find a way to break the circuit.
You can usually free the electrode by quickly snapping the holder backward from the direction of the original travel. If you can’t free it this way, you might need to release the electrode entirely from its holder to break the circuit open.
A word of caution: If your electrode is frozen, do not remove your face shield!! When it comes loose, it will flash brightly and the flash could blind you if your eyes are unshielded.
Frequently Asked Questions
Now that you know how to strike an arc with a welder, you may still have a few lingering questions.
That’s completely normal, and we want to make sure that you are fully equipped to go practice your technique with MIG welding arcs, so we have answered a few of the most common questions here for you.
What do you do if you can’t strike an arc with a MIG welder?
Sometimes, your MIG welder won’t strike an arc. If this happens to you, then it can feel catastrophic and will definitely be frustrating, but there are a few things you can check to fix it.
Here’s a quick overview of the most common problems associated with the issue of arc striking.

First, check your ground connection. In order to work properly, MIG welders rely on a solid and clean grind connection. You should check the welder first.
Make sure that your ground cable is tight and secure inside the welder. Check any connections you have inside your machine to make sure they’re strong. A lot of times, the wingnut and cable fasteners can break or loosen with time.
Groud Clamp Cable. If this fails to work, check the ground cable and clamp for potential problems. The ground clamp is a real workhorse, and it takes tons of stress while you’re operating the welder.
If it gets too much debris on it while you’re working, then it may stop functioning properly. The cable, like any cable, will start to fray and break with time.
If your cable is dirty or frayed, then you will need to replace it quickly. Once you’ve cleaned the cable and ground clamp so there are no remnants of paint, dust, rust or other coatings, you should see if it works.
Power Settings. If you still can’t strike an arc, it might be an issue with the power settings on your welder.
If this is an issue, you can occasionally see a small spark that fails to ignite into a full arc. This may be a problem with your power settings that is preventing enough power to strike the arc properly.
Turing the welder and fan on won’t use much power, but operating it draws quite a bit of power.

Power. If you’ve got old, weak, or otherwise poor wiring where you’re working, then you may be plugged into a source that can’t offer enough power for the machine to draw in order to operate.
You will need to grab a multimeter to test this issue. You should be reading 110 to 120 volts from any wall outlet in order to operate properly.
Extension Cord. If this doesn’t work, then your extension cord may be causing the problem. Any extra connection sees a little loss of power. This means that for every extension cord you are using; a little bit of power is discharged instead of reaching your machine.
You also need to make sure that the one cord you use is as large as possible so it can handle the voltage. Smaller extension cords can’t channel enough power to the machine to make it work well.
They make some 110-volt extension cords that can handle your welder’s needs. Test this one by plugging the welder indirectly and seeing if it can cause an arc.
Check You Consumables. Another possible reason you can’t strike an arc is the consumables. All of your consumable parts will conduct your power through the wire as it leaves the torch.
Check your tip itself. If the tip is jammed or dirty from tons of spatter, then it won’t be able to strike an arc. If you’ve got the wrong size tip then that also provides issues.
Too small, and the wire will get jammed in the tip and prevent an arc. Too large, and it can’t connect with the wire, which will cause an unstable arc at best and prevent one from forming at worst.
Make sure that you’ve got spare consumables on hand.
Find a Cleaner Space. Finally, you may need a cleaner space to work with. If your base metal and surface are not clean, then it may make it impossible to start your arc.
Make sure you prepare your metal ahead of time so it is free from old paint, sealers, rust, oil, or any other coatings that may prevent the welder from striking the arc. Using a grinder can ensure that all the coatings have been removed.
When you finish, wire it down to remove grease and oil from the metal. If you have a clean surface you should be able to strike an arc.
Where is the best place to strike an arc with MIG welder?
The best place to strike your arc is going to be the base metal you’re welding.
Strike it around where you want to start using one of the techniques you learned in this article.
How long should your wire stick out to strike an arc?
For MIG welding, you usually want about 3/8″ of an inch of stick out.
You will know you’ve got it right when you hear a sizzling noise like bacon frying.
Conclusion
If you follow the tips in this article you will be well on your way to striking your first arc with your MIG welder and laying your first bead.