What is the Best Way to Weld a Fuel Tank Safely
If you’re a welder at one point or another you’ve likely had to weld something that could be very dangerous. Welding a fuel tank is one of those things. Whether a gas or diesel tank can be very explosive is not done the right way.
In order to weld a fuel tank, you need to drain all of the fuel, remove it from the vehicle, air it out, and clean it before welding. Finally, you want to perform a weld test to make sure it’s safe before welding. You’ll also want to take the proper safety precautions before welding.
Welding the fuel tank is actually the easy part of the whole process. The problem comes when getting the fuel tank ready so you can weld it. In the rest of this article, I’m going to share the exact process to weld a fuel tank and the safety precautions you should take before doing this.
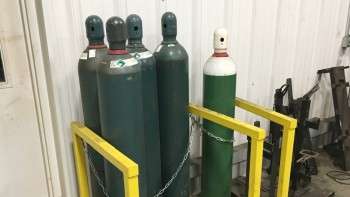
Side Note: Please take the proper precautions before welding a fuel tank. If you don’t have the proper space or tools to do this take it to a professional that does know more about this.
Welding a Fuel Tank – The Cleaning Process
Below is the exact process I use to clean out a fuel tank.
1. Remove the Fuel From the Tank
First, you need to drain the fuel out of the tank. It is important to have the appropriate equipment to do this.
A large enough container to transfer the fuel should be readily available.
The fuel tank should be turned to the lowest point where the most fuel is accumulated. An easy way to do this is to find a way to prop up the fuel tank and let it drain for as long as absolutely possible.
While the fuel tank is still dripping, it is a good idea to shake and rattle the tank around to get any excess fuel from the sides.
2. Remove the Tank From the Vehicle
Next, you need to remove it from the vehicle where it is mounted to.
Common tools should be plenty to handle this task. It is important to work in a well-ventilated area with ample light to get the first step done properly.
It can be very helpful to have work lights underneath the vehicle if a lift jack is unavailable to have the vehicle above the worker.
These lights can be strategically placed so that the worker is able to see the tank and bolts from all different angles. Having light makes this task much safer as well as much easier to carry through.
3. Air Out the Tank
Once all of the fuel is drained out of the tank, a good idea is to leave the tank as open as possible (with all fuel lines and valves unplugged), and let it “air out”.
Take note, gasoline fuel is much easier to evaporate than its counterpart of diesel. Nevertheless, a tank should be allowed to sit for quite a while before the cleaning process begins.
4. Clean the Tank
Once most of the fuel is out of the tank, the cleaning process can begin. Soapy water is a great way to clean out the inside of the tank.
Different agents can be used, but even something as simple as Dawn dish soap will be able to get the job done properly the first time.
Some people will decide to insert flexible stem brushes into the fuel tank and scrub the inner sides of it. While not always necessary, it is still a good idea to do this if the proper tools are available.
Without flexible stem brushes, a person can seal up the tank and jostle it around to get the foamy, soapy water action to work.
The tank should be vigorously shaken numerous times, even if flexible stem brushes are used. By doing this, all parts of the tank including the inner ribs and rivets are being contacted by the foamy soap and water.
It is never too much to repeat this process numerous times.
5. Remove Any Excess Soap
Once the fuel tank has been cleaned with soapy water, the soap needs to be evacuated from the tank.
Not only could this create rust inside of the tank, but any residual soap could contaminate the fuel once the fuel tank is installed back onto the vehicle.
Just like the process with the soap and water, pure water should be entered and evacuated, as well as jostled around the tank numerous times before beginning to let the fuel tank dry out.
6. Let the Tank Dry Out Thoroughly
The most time-consuming part of the cleaning process is letting the fuel tank dry out. There is not much aide a person can do to dry the tank, other than the tenure of time.
If a rag were to be inserted into the tank, it could easily become stuck and never be retrieved.
To properly dry a fuel tank, it should be supported with the lowest open part downward. This way, all moisture, and water will be able to easily be evacuated out of the bottom of the tank. It is best to do this with warm air on a sunny day.
A trick that many people can use is placing a fan near the tank. As silly as it sounds, this will help air circulate through the tank.
By doing this, the water is forced to either evaporate or slowly drip out the bottom of the tank.
When the Tank Welding is Ready to Begin
Once the tank has been removed, cleaned with soap and water or a similar agent, and thoroughly dried, the time has come to begin the welding process.
1. Run a Chemical Test – Optional
As an added bonus, there are chemical tests readily available that can be used to determine if there are any excess vapors left in the fuel tank.
Sparks created from welding are very hot and can stay in the air for a long time. Even if a small trace of vapors is left in the fuel tank, a spark from a welder can cause a very dangerous and costly explosion.
If fumes are found present in the fuel tank, an air hose can be used to help vacuum or evacuate the leftover fumes from the tank. By doing this, the tank will be more solid air inside as opposed to dangerous fumes.
2. Conduct a Weld Test
Once the chemical or fire test is completed, if chosen to do so (highly recommended), it is important to conduct a few different small weld tests around the tank. This will help ensure that the integrity of the tank stands firm.
Safety Tip: Make sure the tank is completely opened up. If the tank is sealed and under pressure, any spark from the remaining fumes could cause an explosion.
When welding the tank itself, it should always be done according to the manufacturer’s specifications. Doing things differently than recommended can cause dire consequences later on. No welder would want to be responsible for that.
3. Weld the Tank
Once the welding test is done and you’ve concluded that the tank is safe to weld you may finish welding the tank as needed.
Again follow manufacturer guidelines as they recommend.
Extra Safety Precautions
Now that you’ve gone through the process of welding a fuel tank I have a few extra tips for you to follow.
Tip #1: Don’t Weld with Fuel in the Tank
A person should never attempt to weld on a fuel tank with fuel in the tank.
Whether it is diesel fuel, gasoline fuel, or even an alternative fuel, welding a fuel tank with fuel inside of it will never end well.
It can lead to loss of life and limb.
Tip #2: Leave the Fuel Cap Off of the Tank
When welding, it is extremely important to always leave the fuel cap off of the tank. If the tank is sealed up, an explosion could occur at any time that welding takes place.
The reason for this is that the tank is still under high pressure being that all is inside is closed air.
Another note on this is that nobody can be certain that every last fume has been reasonably evacuated out of the fuel tank. All it takes is a tiny amount of vapor and a few sparks from a welding machine to spark a catastrophic fire.
Any time welding takes place on a fuel tank, the cap should always be removed and stay removed. All fuel lines and pieces inside of the tank should be removed as well because fuel vapors can also wind up stuck in these places.
Tip #3: Weld in an Open Area
It is important for a person to always weld in an open area. If the tank were to catch on fire, it would ensure that the people around could escape to safety.
A person should never weld a tank that is still attached to a vehicle.
Tip #4: Keep a Fire Extinguisher Close By
Fire extinguishers should always be kept on hand as well. They should be properly rated to put out fires caused by fuel or fuel vapors.
It is important to remember that a safe fire extinguisher is properly charged and that the expiration date on it has not been reached.
Safety gear should also be taken into consideration. Welding helmets and fire-resistant clothing are very important.
Tip #5: Don’t Weld a Fuel Tank By Yourself
If disaster strikes and a fuel tank does end up catching on fire, it is important to let it burn and keep important objects and people far away.
It is never a good idea to dump out fuel from a burning tank; all it will do is fan the flames.
Most importantly, if a fire gets out of control, a person should always dial 911 immediately to have help on the way.
This is why you should never do this by yourself because if the worse does happen at least you’ll have someone there to call emergency personnel.