How Do You Fix an Undercut Weld? – Complete Guide

As a welder, you will learn that there are certain imperfections and mistakes that can happen in any welding job. Sometimes these happen because you’re still learning and sometimes they happen because we don’t notice a change we should make in our setup or we’re simply being careless.
One particular issue I’ve come across is an undercut weld. This is yet another issue that can compromise the structural integrity of your weld and must be fixed before you can leave that weld as complete. You will certainly be able to pinpoint an undercut weld as you work or when you finish your weld.
So, how do you fix an undercut weld? An undercut weld happens when you are welding to slow, welding too hot, or welding at the wrong angle. This will cause a cavity to form either below or above the weld and result in a weaker weld. To fix this turn down your amperage, speed up your weld, and turn up your wire speed to help fill in the weld.
In this guide, we will discuss what an undercut weld is and cover some other topics like how do you fix an undercut weld, what causes undercut in a weld, how do you prevent an undercut weld, and more. By the end of the guide, hopefully, you will have a good understanding of undercut weld and know several tips for preventing this from happening to your weld.
The Complete Guide to How Do You Fix an Undercut Weld?
Undercutting in welding is not new terminology and in fact, it’s something that happens quite often with welders.
Whether you’re new to welding or you’re an experienced welder really doesn’t matter, there’s a good chance you will face an undercutting issue at some point in your welding career – maybe multiple times. But you don’t have to be the cause of the undercut.
We’re going to cover undercut welding from start to finish so you understand what it is, what it looks like, what causes it, and what you might be able to do to prevent it.
Let’s get started.
What Causes Undercut in a Weld? Identifying Undercut and Understanding the Cause
Let’s first start out by explaining what an undercut is. This is a common flaw and something we see all the time but you need to be able to learn how to make welds with no undercut in order to truly be successful as a welder.
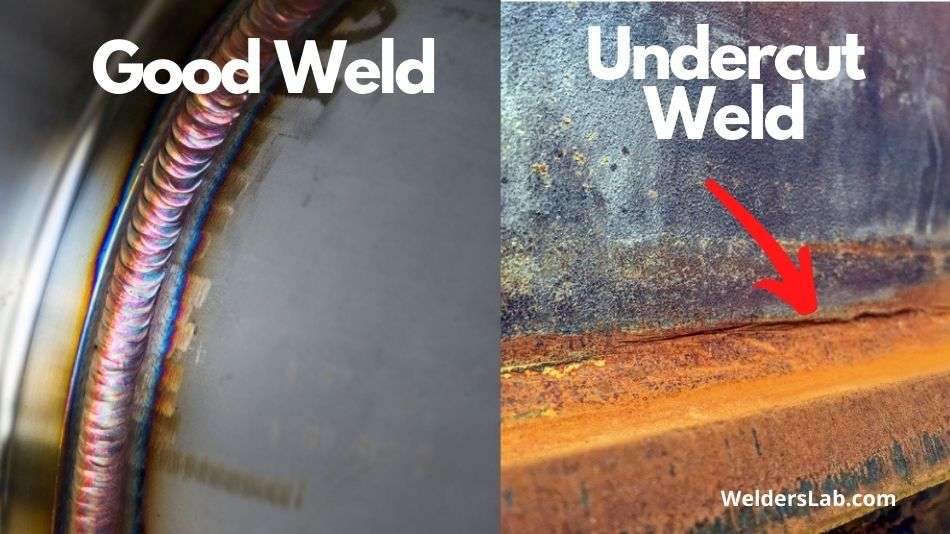
Undercutting is a groove that develops during a weld. It can show up in the base metal near the toe or root of your weld. Undercut is a side effect of the weld metal not filling the grooved area. Your weld is bound to have cracks along the toe of the weld. It’s also an indication of a weak weld.
Not only is undercutting an indication of a bad weld job, it can be quite costly because it slows you down when you have to fix it. And then, if you don’t fix it, it can cause other problems that we don’t even really want to get into.
Welding is a reactive technique. You have to learn proper technique and skill and you need to determine the kind of end result that you want. Aside from that, you can’t really plan your weld because every welding job is unique and different.
The things that truly impact an undercut are things like how you hold your hand during the process, the angle at which you weld, your heat and metal, using enough filler metal, and so on.
How can you possibly control this process and make sure you aren’t causing deeper penetration than you truly need? It’s about control and understanding that to make a specific measurement of weld, you want to reduce the size of crater you’re making.
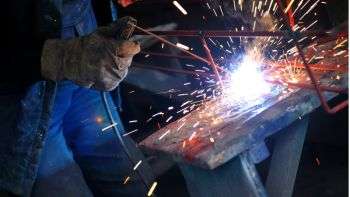
You are in control of the weld, from the heat, the gas, the metal, and more. Here are some tips that might be helpful as you weld.
- Control the length of your arc
- Control the temperature appropriately (don’t make it too low)
- Keep your movements smooth and even
- Be patient and allow your groove time to properly fill in
- Focus on the toes of the weld as that is the most likely area for an undercut
- Remember that it’s primarily about the process
- Pay attention during your weld process
You should be able to easily identify an undercut weld. It’s going to be obvious when you’re looking at it. Your weld won’t look like it’s filled in appropriately and at the toe of the weld, you will most likely see an inverse “U” at the beginning.
There will be a groove where the base metal is mixed with the weld but the groove isn’t completely dilled appropriately for a sturdy weld.
How Can You Fix an Undercut Weld?
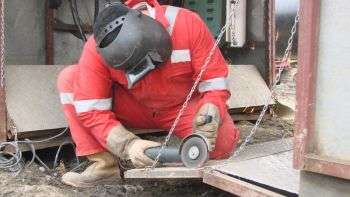
You might think that the solution to fixing an undercut weld is to grind the undercut and start over. While you might grind to smooth your surface back out, this actually won’t get rid of the problem and clear up the space for you to start over.
Remember that an undercut is caused by the loss of material in your weld so grinding it out isn’t really going to do much for you. You’re most likely going to have to patch and blend in order to fix the weld.
Undercut is typically a side effect of welders not taking the time to hone their skills and not taking the responsibility to improve their techniques to avoid such an issue.
Rather than having to worry about trying to fix an undercut, it’s much better to educate yourself to try to prevent undercut from happening.
If you look at the instruction from the American Welding Society, they instruct you to prep your surface through the cleaning or grinding as necessary and then weld additional metal to fill in space and perfect the weld. Any other type of action would need to be reviewed and approved by an engineer.
How is Undercut Measured in Welding?
There are of course standards as to how much undercut is allowed. In terms of how much undercut is allowed, the rule is that undercut shall not exceed 1/32 of an inch.
There is an exception to that rule, which is that the undercut cannot exceed 1/16 of an inch for an accumulated length up to 2 inches in any 12-inch weld. Ultimately, what you need to remember is that the depth of the undercut cannot exceed 1/32 of an inch.
If it’s any less than that, it’s considered acceptable according to industry standards and rules.
Now, that being said, it should be your goal to have no undercut if at all possible. And, if you hone your skills and learn proper techniques, it truly is possible.
Undercut welds are typically a sign of carelessness or welders that don’t know how to adjust their techniques to better their welds. It could also be because beginners require time and practice to improve upon their skills, and that’s ok.
The best way to measure your undercut is to use a bridge cam gauge. This gauge inserts into your gouge and can give you a reading of how deep the undercut is and whether or not it is allowable.
How Can You Prevent an Undercut Weld?
If you’re looking for tips on how do you prevent an undercut weld, my top tip is that you slow down and pay attention while you’re welding.
Remember that undercut is typically caused by improper technique. The top ways to prevent undercut are as follows:
- Reduce arc length
- Reduce speed at which you travel
- Use proper electrode angles
Remember that skills take practice. Don’t be afraid to practice. When it comes to welding, practice makes perfect. Learn how you can properly position your hands, how to shorten your arch, and how to be patient while you move along your weld.
The combination of these 3 aspects is much more likely to give you a successful weld with no undercut. So, remember to just slow down and pay attention to what you’re doing so that you can do it right the first time and prevent further issues.
Conclusion
Ultimately, the goal is for you to be able to produce a sturdy, high-quality weld with little to no undercut. Undercut reduces the integrity of your weld and doesn’t look as nice either. It requires additional work to correct.
If you think that rushing through a project and having undercut is normal, you’re wrong. It doesn’t increase your productivity, it actually hurts it because then you have to turn around and fix the weld.
Don’t be afraid to slow down, pay attention, and continue to practice your skills. Your improved welding will be a direct reflection of your skills and your efforts.