How to Change the Gas Tank on a Welder
When it comes to welding one of the most common task I have to do from time to time is changing the tank of gas used to shield the weld as you lay your bead. However, there is an exact process you must follow to change out tanks properly.
How do you change the gas tank on a welder? To change a gas tank on a welder you’ll want to follow these 8 steps.
- Check the current tank to see if its empty.
- Remove the regulator
- Put the tank cover on
- Mark the used tank empty
- Take the cover off of the new tank
- Purge the tank to clear out any dirt
- Put the regulator back on
- Spray the regulator with soapy water to check for leaks
Of course, this is just a basic overview of the process and there is a bit more to it. So if you’ve never changed a tank of gas on a welder before take a moment read through the rest of this guide to help do it the correct way and I’ll also share more tips and tricks along the way.
How to Change the Gas Tank on a Welder
Below is the step by step process I use to change tanks on my welder.
Step #1: Check the tank to see if it’s empty. Before changing any tanks it’s good to make sure that the used tank is empty. To do this check the regulator. The regulator has two gauges on it, one tells how much gas is in the tank the second gauge tells you how much pressure you are using. If the tank is empty close the valve at the top of the tank.
Step #2: Remove the regulator. Next, you’ll need a wrench to remove the regulator from the tank. Double check to see if the tank has left handed or right handed threads. Also, make sure to lay the regulator down carefully as they damage easily if they would happen to get dropped.
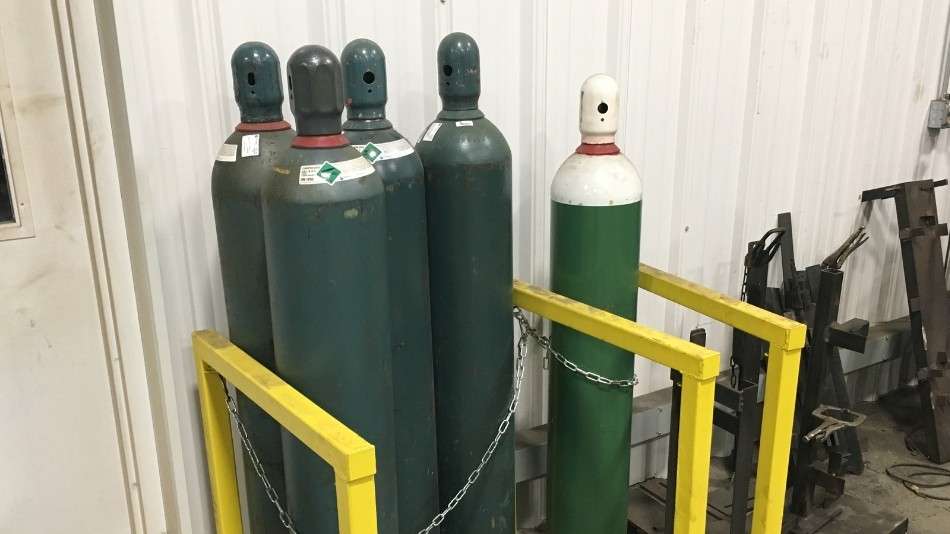
Step #3: Put the tank cover on. Once the regulator is off you’ll want to put the cylinder cap on immediately before you move the tank. Welding tanks are pressurized and if they would happen to fall this could break the value and cause an accident. Once the cap is on you can unchain the tank from the welder.
Step #4: Mark the tank as empty. Once the tank is removed from the welder you’ll want to mark the tank so people know that it’s empty. One thing we do in our shop instead of marking them is that we have a designated place for empty tanks and a spot for full tanks. We also change the tanks to prevent them from falling as well.
Step #5: Take the cover off of the new tank. Now that you’ve removed the used tank you can put a new tank in its place. You may have to lift the tank onto the welding cart and depending on the type of tank you have this can be fairly heavy. Once the tank is on the cart and chained up you can remove the cylinder cap.
Step #6: Purge the tank. At this point, you’ll want to open the valve at the top of the tank slightly to purge it. This is done to remove any dirt that might be in the value. Not doing this could for loose dirt into the regulator blocking the gas. The tank will produce a loud hissing sound, once you hear this close the value immediately.
Step #7: Put the regulator back on. Now that you’ve purged the tank you can put the regulator back on the tank. You’ll want to point the regulator slightly up when you tighten it as it will adjust straight. Also double check to make sure the rubber washer inside the threaded part of the regulator doesn’t fall out as this could cause a leak.
Step #8: Spray the regulator with soapy water to check for leaks. If a regulator doesn’t get fastened properly it could leak. To do this spray some soapy water on the regulator. If you see any bubbles coming up you likely have a leak. Also be sure to check your settings on the regulator as they may have been bumped in the process.
How to Make Sure the Gas is Flowing Properly
Once you have the tank hooked up properly you’ll want to check to make sure the shielding gas is flowing correctly. To do this turn the welder on and open the tank valve. Next, you’ll want to hit the trigger on the welding gun and hold your hand in front of the nozzle to feel if an air comes out.
Safety Tip: As the wire comes out of the gun do not let it arc to your welding table as this will cause the wire to burn and melt which could burn you. Instead, keep a safe distance from your table to check for gas.
If you feel the gas hit your hand the gas is working if you don’t feel any gas it could be a different issue.
What if I Don’t Get Any Shielding Gas
If you run the test above and you don’t get any gas there can be a few reasons why this is happening.
First, check the regulator to make sure the setting are correct as you had them before you switch the tank. If the regulator isn’t showing any gas then it could be possible you put a tank on that you didn’t know was empty.
Second, check the regulator for dirt. It’s possible that a piece of dirt got caught in the regulator and is blocking the gas. In a lot of cases you just simply remove the regulator and the dirt will fall out, but if it does not you may need to take it to a professional who can clean it out.
Finally, you may have a bad valve. When you hit the trigger on your weld gun it opens a valve inside the welder that allows the gas to flow through. However, from time to time, these valves do go bad, if this is the case you will need to replace the value.
If all else fails double check to make sure that you did actually open the valve at the top of the tank. Yes, I am speaking from past experience here.
What if the Regulator is Leaking
Finally, if you happen to put the regulator on and you notice a leak there are a few things you can do.
First, if the leak is coming from around the collar where it screws onto the tank it could be that you didn’t seal the regulator to the tank correctly. A lot of times there is a rubber seal that fits inside the collar that helps seal the tank and sometimes this can fall out when changing tanks. So take a look around on the floor to make sure you haven’t dropped it.
Second, check the hoses that go to the regulator. From time to time these hoses can get stiff and crack and when they do you may be leaking enough gas that it won’t make it to the regulator. You’ll need to replace these before you go any further.
Third, have the regular checked by a professional. If the leak is to strong shut the tank off immediately and remove the regulator from the tank. Sometimes these regulators can be fixed and in some case, you might be better off just getting a new regulator. I’ll be honest regulators aren’t cheap but if they cost too much to fix you’ll be better off just getting a new one and saving yourself all the hassle.
Related Questions
#1 What type of welding gas should you use? For mild steel, you’ll want to use a mixture of Argon, CO2, and Oxygen. For stainless steel, you’ll want to use a stainless trimix using Helium, Argon, and Carbon Dioxide. Finally, for aluminum, you’ll want to use Argon or a mix of Argon and helium.
#2 What is the correct gas pressure for MIG welding? You’ll want to be between 25 and 30 cubic foot hours on your regulator. To do this hold the trigger on your welding gun and adjust your setting until you have it set correctly.
#3 Do you need to use gas? If you don’t like the idea of changing tanks on your welder you may want to consider using flux core wire. This is a special welding wire that is coated with flux and when it burns acts like a shielding gas.
Changing tanks on your welder can be a fairly simple and safe process as long as you follow the steps I’ve shared in this article. So, what have you learned about changing tanks on your welder?