26 Tools Every Welder Needs Starting Out -2026 Ultimate List
As a welder over the last 20 years, I’ve used many different tools to fabricate and build various projects for myself and customers alike. In this article, I’m going to share tools every welder needs.
What tools does every welder need? Below is a list of tools every welder needs to have:
26 Tools Every Welder Needs
In this article, I will cover these tools and accessories in-depth and share the ones I like to use. Also, remember you don’t need all these tools to be a welder. These are just the tools I’ve found helpful to have.
#1 Welder
- POWERFUL 6-IN-1 MIG WELDER: The multi-process welding machine that included Gas/Solid Wire MIG(GMAW), Gasless Flux Core …
- SYNERGIC MIG: Digital control and automatically match the recommend current and wire feeding speed when selecting the di…
- MULTI-FUNCTIONAL WELDER: The MIG welder features some special functions that included adaptive crater, burn-back adjustm…
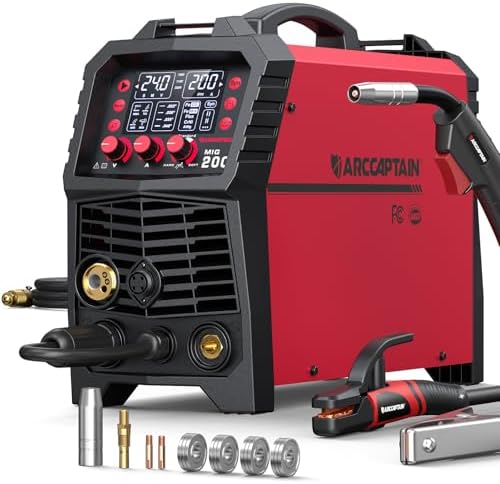
The ARCCAPTAIN 6‑in‑1 MIG welder is a compact, versatile unit that covers gas MIG, gasless flux-core, stick, lift TIG, spot welding, and spool-gun aluminum work in one machine.
Synergic controls make setup easy for beginners while still allowing manual fine-tuning, and users report smooth arc starts and clean welds for the price.
You will need extra accessories for aluminum and TIG, but overall, it’s a strong option for DIYers and small shops who want one welder to handle most everyday projects.
#2 Gloves

- Red Ram premium grade grain goatskin Mig/Tig welder gloves
- Gloves has gunn pattern and 5-Inch russet split cowhide bell cuff with inseam hem
- Sewn with Kevlar with straight thumb type
These MCR Safety Red Ram gloves are made from tough goatskin leather that won’t stiffen up or crack like cheap welding gloves. I use these at my shop, and they work great for handling small parts.
The 5-inch cuff protects your wrists and forearms from sparks, while the Kevlar stitching means they won’t fall apart after a few uses. Whether you’re making repairs around the house or working professionally, these gloves give you the grip and feel you need without sacrificing protection.
They’re unlined, so your hands won’t overheat, and the quality construction means you’ll save money in the long run by not having to replace them constantly.
#3 Safety Face Shield
- HIGH IMPACT FACE SHIELD – Sellstrom’s Advantage Face Shield is ideal for various types of machinery, welding, cutting, g…
- FULL FACE PROTECTION – Protects the front of the head, the face and the eyes from high impact, chemical splashes, non-io…
- EXCEPTIONAL CLARITY & COMFORT – Clear uncoated high impact polycarbonate window; Ratchet headgear with twist knob provid…
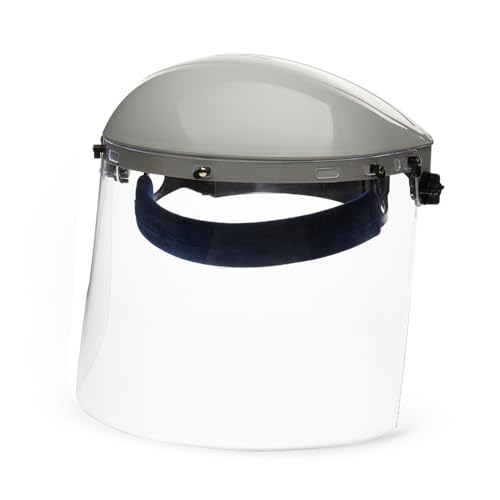
When it comes to safety glasses, most people tend to forget this one. However, I have had enough stuff in my eyes over the years to know that you should always wear them while working with metal.
I remember one time in particular when I got a piece of metal in my eye right before a vacation. At first, I thought it was a scratch, but afterward, I went to my eye doctor to learn I had a piece of metal stuck in my eye. OUCH!
With a good safety shield, you’ll avoid getting metal in your eyes and save on doctor bills.
#4 Welding Helmet – AutoDark & Fixed Shade
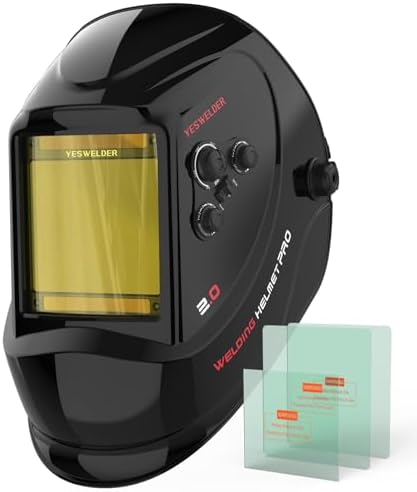
- Advanced Eye Protection with Blue Light Blocking Technology: This welding helmet features cutting-edge Blue Light Blocki…
- Multi-Application Wide Shade Range: Wide shade range 3/5-9/9-13, covering most common welding processes for TIG, MIG, MM…
- True Color & Clear View: This auto darkening welding helmet is equipped with a 3.93″X3.66″ Large View, enjoys a True Col…

- DURABLE DESIGN – Jackson Safety welding helmet features a durable design with added lip for slag and other hazards; the …
- ADAPTABLE & UPGRADABLE – This shield is hard hat adaptable and can be easily upgraded for use with Jackson Safety Insigh…
- MULTI-USE – Auto darkening welding helmet features a narrow shell design that’s best for working in tight spaces
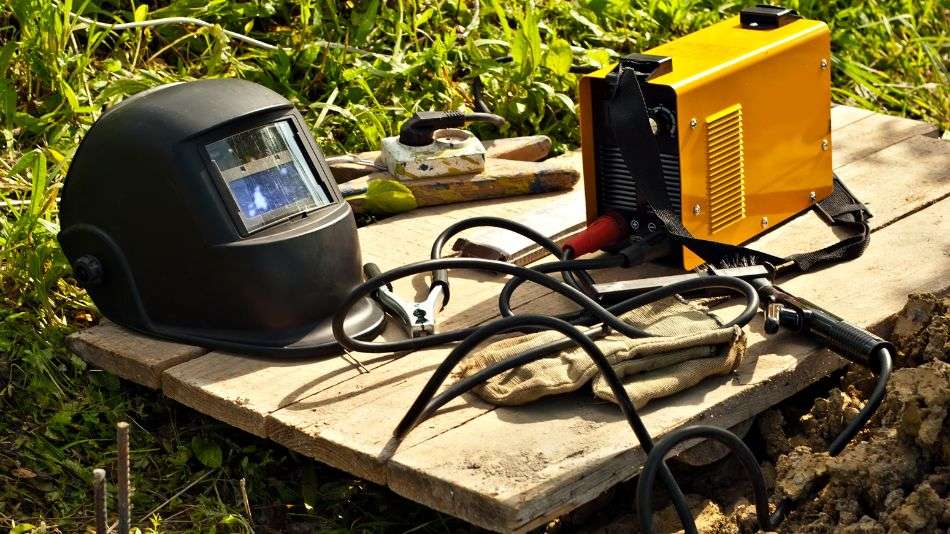
One tool you’re going to need is a welding helmet. A welding helmet is a must-have tool for every welder. Here are just a few things it can do for you.
- Protect your eyes from getting burned.
- Protect the skin on your face from getting burned.
- Allows you to move from weld to weld quickly.
- Let you grind without getting debris in your eyes.
When it comes to welding helmets, there are two main types: auto-dark and fixed shade helmets.
A non-autobraking helmet has a dark shield that always stays dark, and the only way you can see through the helmet is when you are welding. This is the way I started welding.
The other option is to use an auto-dark helmet. This helmet works based on light. This type of helmet has sensors on the front of the helmet, and when you start to weld, the light hits the sensor, and the helmet goes dark.
#5 Welding Sleeves
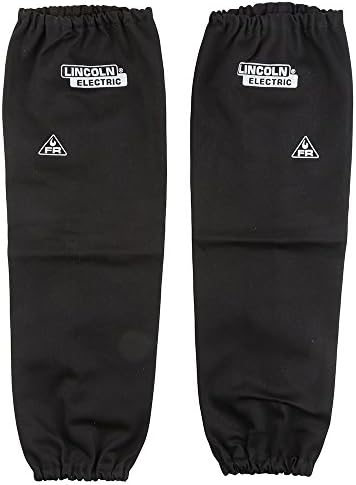
Welding sleeves are another item you’ll want to have with you. As you can tell, many of these first few tools are mostly protection tools, but protection is a big part of welding.
Welding sleeves protect your arms from getting burned by the heat and spatter produced by the weld.
They also protect your clothes from getting burned up since they are made of mostly fire-retardant cloth.
#6 Welding Beanie

- 100% Cotton
- Imported
- 100% COTTON FABRIC: Constructed of fabric that is soft, lightweight, and machine washable. Helps keep you cool and comfo…
Like welding sleeves, a welding beanie protects your head from spattering burns.
I’ve dealt with my fair share of burns from welding without these protective tools, and the best part is these things aren’t that expensive.
However, I like those with a bill on them when it comes to welding beanies. A beanie with a bill is meant to be worn backward like a fire hat to protect you from spattering down your back.
#7 Welding Jacket

The final protection tool is a welding jacket or welding apron. This tool is meant to protect your chest from welding. Your hands, face, and chest will be the closest to the weld.
A welding jacket or apron is the best option to protect your chest. I’ve seen a lot of different kinds of these, from leather to cloth jackets.
I like cloth jackets better than leather because they are much heavier and hotter in the summertime.
#8 Welding Pliers

- 【6-In-1】 Perfect for drawing wire, splatter removal, tip removal & installation, hammering, wire cutting, nozzle removal…
- 【APPLICATION】 Ideal for welding, plumbing, farm, electrical, mechanical, workshop and home use. A must have have tool fo…
- 【DESIGN】 Long Serrated jaws for additional maximum gripping strength. Spring loaded design reduces hand and wrist fatigu…
Now it’s time to get into the real tools every welder should have. And first on that list is a welding plier. This is a special tool that is meant to help you do a multitude of things, from:
- Clean the spatter from your nozzle.
- Remove the weld tip or diffuser.
- And even clip your welding wire.
Of all the tools I have, this is one you cannot live without because I use it daily to manage my welder.
#9 Marking Pencil

- Sufficient Quantity: it comes with 2 pieces of welders pencil and 48 pieces of refills in 4 boxes, 12 pieces in each box…
- Illuminate metal marker: the 2 mm round refills can lay out an illuminate marker that is not easily erased compared with…
- Simple to use: each welders pencil has a built in sharpener, convenient for you to sharpen the refill quickly, and the t…
Next on the list of tools every welder needs is a marking pencil. A marking pencil is a special pencil that is made for marking on steel. I use this tool to do everything from:
- Mark steel where I need to cut it.
- Mark where I need to weld an adjoining piece of metal, too.
- Mark where you need to weld and much more.
#10 Angle Grinder

- Plastic / Metal
- Made in the USA or Imported
- Next generation 11 amp AC/DC 11,000 rpm motor on the electric grinder provides the best power to weight/size ratio avail…
The next tool you’ll want to have next to you is an angle grinder. An angle grinder, also known as a hand grinder, allows you to grind metal to smooth out cut metal.
Here are just a few things I use my angle grinder for:
- To smooth out fat welds
- Clean up spatter on metal
- Cut down metal
So if you do a lot of fabrication projects and you do a lot of shaping and cutting with metal, this one tool you’ll want with you.
#11 Chipping Hammer

- Package Included : 1 x welding hammer.
- High carbon steel welding chipping hammer, tempered chisel on one end and point on the other, chisel to get into tight s…
- Well balanced spiral handle on the hammer for ultimate comfort and shock absorption during metalworking.
Another tool I use on a regular basis is a chipping hammer. Now, a chipping hammer is typically used with stick welding to chip slag away from the weld.
However, I like to use it for cleaning the spatter of metal. Depending on how your welder is set, it could leave more spatter, which can be hard to remove from the project you are welding.
As a result, I’ve found a chipping hammer to be the best solution here because it does minimal damage to the metal and doesn’t gouge the metal as an angle grinder does.
#12 Wire Brush
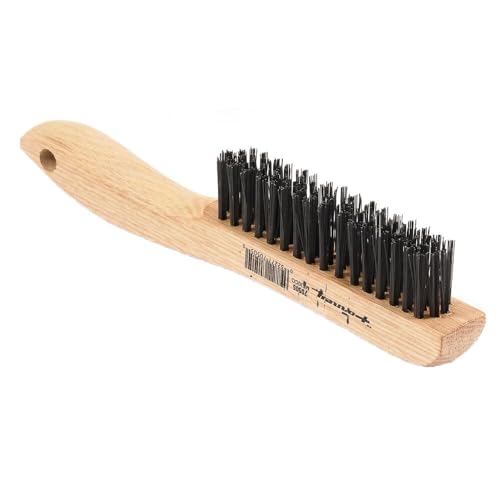
- Strong and durable with solidly imbedded carbon steel bristles
- Wood shoe handle with pre-drilled hole for hanging
- Ideal for aggressive cleaning and removing rust and paint from most surfaces
Along with a chipping hammer, I also like to use a wire brush. This tool works great for cleaning a weld surface before and after welding.
Here are just a couple of situations I’ve used a wire brush for:
- Cleaning rust off of metal before welding
- Removing paint from metal before welding
- Cleaning around a weld to give a more polished look
Overall, this is an inexpensive tool that all welders should have to improve their welding quality.
#13 Tip Dip

- Gel eliminates erratic operation with a film that will not clog orifices and threads on MIG nozzles and contact tips
- Suitable for use on fixtures of semi and automatic welders
- Odorless, non-flammable, non-toxic and silicon free

When it comes to cleaning your welder, I also use something called tip dip. Tip dip is the grease that you dip the nozzle of your welder into to help protect it from spattering build-up.
Once your nozzle is coated and clean, it will allow for the welding gas and wire to properly flow from the welder.
#14 Tip Cleaner
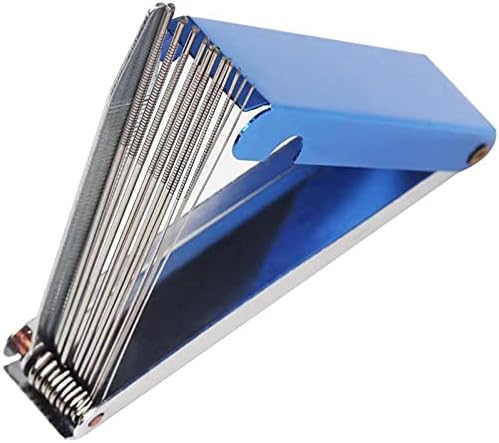
- 1.High-quality materials: The carbohydrate cleaning tool is made of high-quality stainless steel, and is equipped with a…
- 2.Different diameters: There are 13 kinds of carburetor cleaning kits (0.4, 0.5, 0.6, 0.7, 0.8, 0.9, 1.0, 1.1, 1.2, 1.4,…
- 3.Widely used: Welding gun nozzle cleaning tool can be used to clean small orifices such as spray guns, nozzles, pneumat…
Another simple tool I like to keep on hand is a set of tip cleaners. Tip cleaners are like small, round files used to clean out the tip in your welder.
Welding is a fairly dirty job by nature, and the dust and dirt it creates will tend to land on the wire spool. As that wire moves through the welder, it will eventually bring enough dirt to the tip, plugging it up.
A good set of tip cleaners works wonders to remove this dirt.
It also works well when the wire burns back in the tip, plugging the tip hole. Sometimes I can get them unplugged, but you may have to replace the tip if it’s too severe.
#15 Vise-Grips
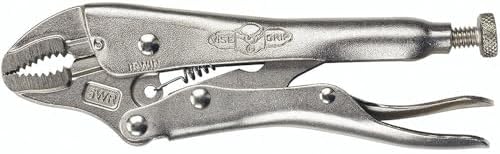
- 5″, with a jaw adjustment up to 1 1/8″
- Curved jaws, knurled tips and wire cutters
- Lock on instantly and release quickly
The next tools I will cover will help you clamp down on your work; the first one I like is vise-grips. With vise-grips, I can clamp pieces of metal together and hold them in place.
Not only do they work well for holding things in place, but they also work great for welding small parts together. Often, I find some parts too hard to handle since welding gloves can be big and bulky.
To solve this problem, I like to use vise-grips to hold the part until I get it takted on.
Regarding vise grips, I like your typical standard vise grips, but I recommend getting a variety of vise grips for different situations, like these.
#16 Bar Clamps

- Basic Details: The throat depth is 3 inches, the maximum opening capacity is 12 inches
- Drop Forge: Rugged, light-duty forged-steel frame provides increased durability
- Strong Clamping Force: 450 pounds of clamping pressure ensures a stable and secure fit, while the non-marring pads preve…
Next, I also like having a good set of clamps around, like the ones in the picture. These work great for holding bigger pieces of metal together.
At my shop, I have clamps that go up to 12″ wide. For bigger projects, I use something called a pipe clamp, which is a clamp that mounts on a pipe. I use a 3/4″ sch80 PST (Pipe Size Tubing)
The great thing about these clamps is that I can make them as big as I want.
#17 Welding Magnets

- POWERFUL HOLDING FORCE: Featuring robust magnets embedded in the welding holder, these durable magnets boasts a strong m…
- MULTI-ANGLE CAPABILITY: The innovative arrow-shaped design provides exceptional angle-holding versatility, supporting 45…
- WIDE-RANGE APPLICATIONS: Ideal for use as a holder and positioner in welding, soldering, marking off, and pipe installat…
Another way to hold the metal without a clamp is to use a welder magnet. I have a set of magnets to hold the metal in various positions.
So whether I want them held in a 90-degree or a 45-degree position, these magnets will hold them in just the right spot.
They also work great when clamps don’t work. For example, if I had to weld an 8″ IBeam onto another 8″ IBeam, I could use a heavy magnet to hold them in place on each side.
As a result, this will prevent warping and keep the metal in the perfect spot until you get it welded solid.
#18 Welding Blanket

- Well-woven Fiberglass Blanket: Constructed from 24.7 oz/yd² fiberglass material, this welding blanket serve as an excell…
- Fire-retardant, Less Heat Damage: The fiberglass blanket has high thermal protection capability and withstands working t…
- Safe Hanging and Easy Storage: Grommets are placed every 11” (28cm) to ensure an extended and firm suspension. Brass gro…
One tool I find great to have from time to time is a welding blanket. A welding blanket is a special material that doesn’t burn from a weld spatter hitting it.
A welding blanket works great for two primary purposes:
- #1 Protecting stuff around the area you are welding in. For example, if you are welding on a car and don’t want the weld spatter to mess up the paint job.
- #2 Protect the weld itself. A welding blanket also works great for covering you as you weld in an area that may blow away the welding gas. This works great if you are working outdoors in less-than-desirable conditions.
#19 Bandsaw

This next tool can be a bit more expensive, but a bandsaw is a great tool for cutting down metal fast. The good news is that you don’t need a big or expensive start.
Back in the day, we used smaller bandsaws to cut parts, but as my business grew, we found the smaller hobby machines didn’t hold up due to the wear and tear on the bearings and gears.
Today, we use much bigger saws meant to be used in more industrial situations. However, a smaller bandsaw will work fine if you’re just getting started.
#20 Plasma Torch

- POWERFUL CUTTING CAPACITY: Featuring a 20-55A current output, it delivers deep cutting thickness. Ideal clean cut: 19/64…
- NON-TOUCH PILOT ARC: The AG60 torch has great cutting performance, which efficiently cuts through rough, painted, and ru…
- PT/2T/4T FUNCTION: The post time (PT) setting controls the cooling period for the welding head, which extends the lifesp…
Another expensive tool to have is a plasma torch. I’ve used several of these over the years, and they work great for cutting down and shaping metal.
We used this to do everything from cutting lengths of metal down to cutting circles out of sheet metal.
Today, I use a CNC plasma machine to cut out multiple different types of parts for the products I’m building.
However, you don’t need something this big when you’re just starting. A smaller 45-amp machine will work just fine as you’re getting started.
#21 Welding Pocket Book

If you’re new to welding, it’s good to have a welding pocketbook on hand. This little handy book contains various things.
- Conversion charts,
- Safety guidelines
- How to work with certain metals
- Instructions and welding symbols
- How to do certain welds
- And a whole lot more
I also like to have these kinds of welding charts and this MIG and TIG hand calculator to figure out the right setting for my welder.
#22 Tape Measure

- Sold as 1 Each.
- Secure lock helps prevent blade from creeping during use 16″ and 19.2″ stud center markings simplify framing jobs
- Special Tru-Zero hook does double-duty as a pivot for drawing circles and arcs.
Now, a simple tool a lot of people might not think about having is a good tape measure. This is probably the most important tool if you plan to cut any metal; it would be good to know how long it should be.
Here are just a few things I use my tape measure for:
- Checking cut lengths
- Using it to square things up
- Measuring to see where I need to weld something
- And a whole lot more
I’ve found a Stanley 25-foot tape measure to be a great option and usually the type I use.
#23 Fillet Welding Inspection Gauge
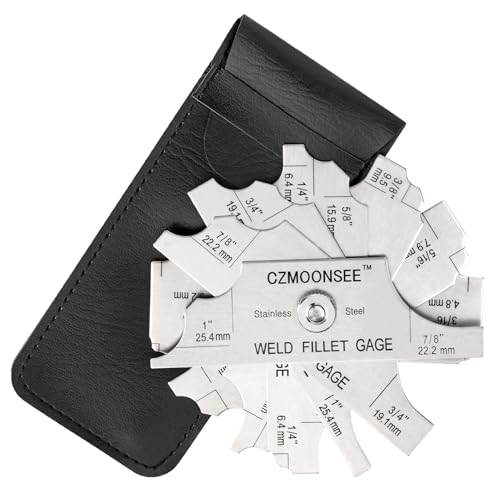
- Material: thickened stainless steel and oversized nuts, sturdy and durable, wear-resistant and corrosion-resistant, with…
- Process: Precision grinding processing, laser engraving
- Purpose: Suitable for inspecting boilers, bridges, shipbuilding, pressure vessels, oilfield pipelines Also applicable fo…
Another handy tool I like to have around is a fillet welding gauge. This is a handy little tool that checks to see how big a weld should be.
For example, if a print calls for 1/4″ round weld, how would that look? You could guess, but the best way to solve this is to have a fillet gauge that you set on top of the weld.
Doing this will give you a clearer idea of what kind of weld is needed in the spot you are welding.
#24 Welding Calculator
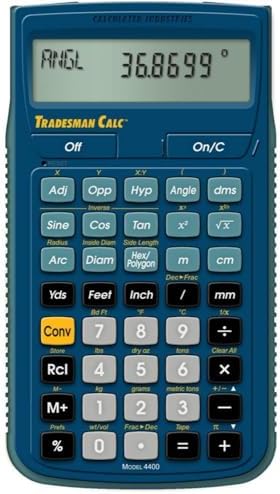
- SOLVE ALL FRACTIONS EASILY in multiple formats so you can calculate actual measurements with plan requirements and deter…
- GET ANSWERS TO APPLIED MATH problems and convert between Imperial and metric units to make calculations straightforward;…
- TRIG FUNCTIONS GET STRAIGHT TO THE ANSWER for angle and side problems; use dedicated keys to enter and solve circle, arc…
I also like to have a calculator around as a welder. This might seem odd, but I find this be a handy tool for figuring out things like material usage or what a certain distance might be.
For example, if I am planning to build a project out of angle iron, a calculator will tell me how many lengths of angle iron I will need to do the project.
This also works great for a situation where you’re also trying to get a quick number on a bid for a project you want to do.
Almost any calculator will do in this situation, but if you’re looking for one that is used for an industrial situation, you can check this one out.
#25 Drill Press

- Powerful 17 inch 12A Drill Press: The equipped powerful 12 A pure copper motor ensure plenty of power to drill through v…
- Precise Drilling: Chuck Capacity:1″;Drill Capacity:1″;Swing: 17″. Garvee floor drill press drills precise holes without …
- 200 to 3630 RPM Variable Speed with Swing-away Safety Guard: Our 17 inch floor drill press feature a continuously variab…
As we get down to these last few tools to have those tools that every welder needs, one that I like to have around is a drill. In this case, I’m not talking about a hand drill but rather a drill press.
A hand drill takes a lot of work and pressure to drill a hole, while a drill press makes this process a whole lot easier.
For example, if I have a block of steel that I’m trying to drill a hole into, a drill press has a table to set it on and allows me to do it quickly and easily. It also lets me apply more pressure to the steel, and the hole will be perfectly straight when I do it.
When it comes down to it, a drill press is not a tool you’ll need right away, but it’s good to have around in any metal shop. At my shop, I have two of them, and they get used nearly every day.
#26 Welding Table
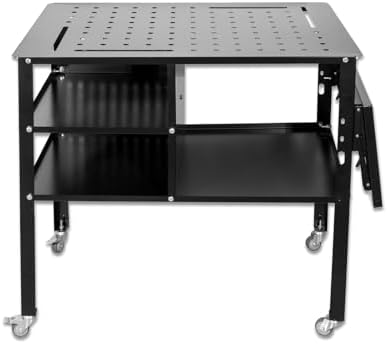
- Professional-Grade Mobile Welding Table: Engineered for demanding factory, garage, and welding applications, this portab…
- Optimized Welding Table Top with Fixture Compatibility: The durable, flat work surface is designed to accommodate standa…
- Versatile & Space-Saving Workbench Design: Featuring innovative foldable side panels, this metal workbench offers expand…
Finally, last but not least, as a welder, you’ll want a nice welding table to work off of. You might be thinking Why does this matter so much But a good welding table allows you to do so much more.
For example:
- Give you a flat surface to clamp down your projects.
- It has a clean surface to hook your ground clamp to.
- Sits at the right height for welding.
- Holds all of your tools and jigs in one nice place.
Over the years, I’ve bought welding tables, and I’ve even made my own. Depending on what you want, it can be costly or fairly cheap.
Final Thoughts…
As I’m wrapping things up here, remember you don’t need to have all these tools when you get started, but they are nice to have over time as you buy them.
What kind of tools do you have that you can’t live without as a welder?