15 Tips on How You Can Improve Your Weld Quality Today
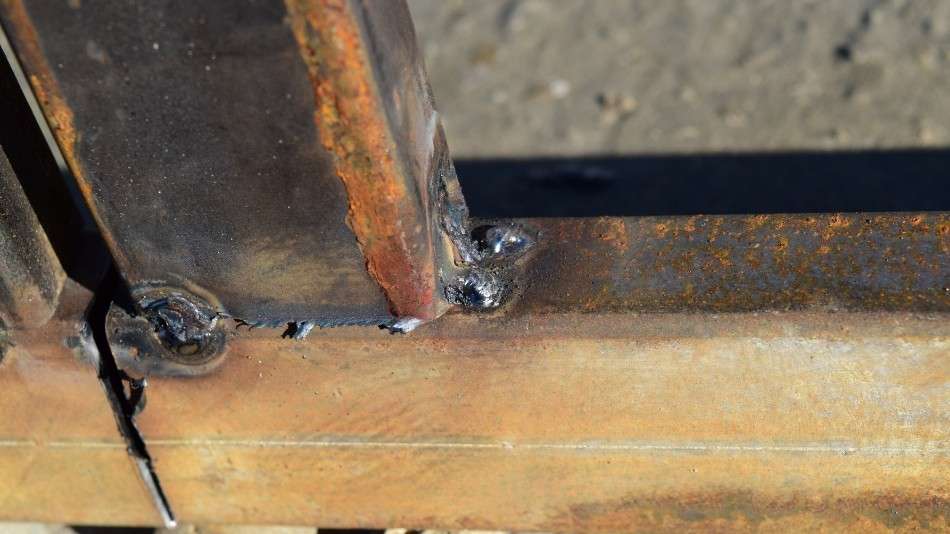
As new welder I made a lot of mistakes. My welding skills were not so good and learned in the school of hard Knox. However over time I learned to learned what it took to make a good weld.
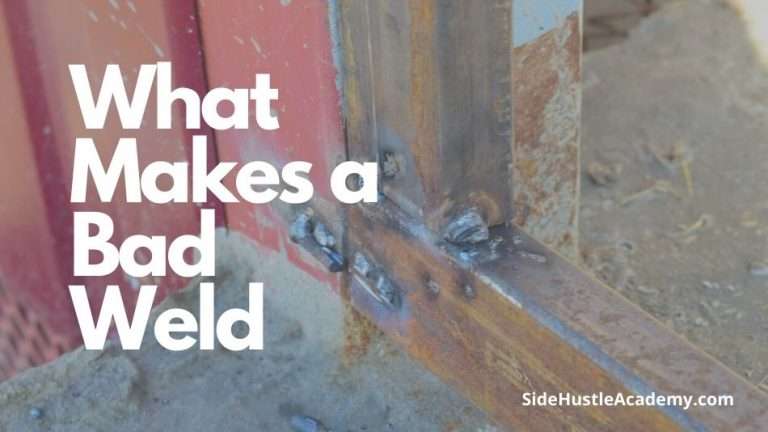
If you’re new to welding and your welds look something like the picture above then these 15 tips that will help start laying better beads today.
#1 Set Your Gas
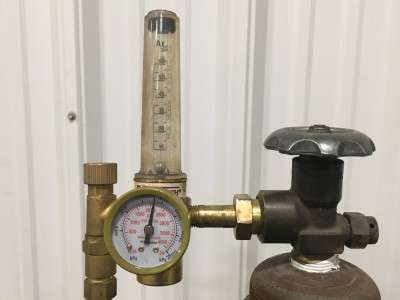
One of the quickest ways you can improve your welding quality is to make sure that your welding gas is set to the right amount. If you don’t have your shielding gas set properly it won’t penetrate very
Welding gas is measured in foot-pounds and typically you’ll want your MIG
welder set to around 25 to 30-foot-pounds per hour.You can set this by adjusting your flow meter on your welder which looks like the one to the right. To check your output level follow these three steps.
- Turn Down Wire Speed. First you’ll want to turn down your wire speed so you can check the gas levels.
- Hold the Trigger on the Weld Gun. By holding the trigger the flow meter will push a tiny ball up to the level of gas coming through the gun.
- Adjust the level. Once you’ve got an idea of how many foot pounds are coming out adjust them between 25 and 30 foot pounds.
Related Article: How Much Gas Does a MIG Welder Use
#2 Slow Your Welding Speed
The next thing you can do to improve your welds is to pace yourself and not try to push the weld to fast. If you do the weld will look thin and tall and not penetrate very deep.
I’ve found a good bead can’t be rushed. Rather I find that it’s better to let the bead take its own as you guide it along the way.
To do this relax and just let the welder do the work. To make a quality weld you need to keep a steady and easy.
#3 Set Your Wire Speed
The next thing you need to consider is how fast your wire speed is. To fast of a wire speed and your welder will give you more of a popping sound.
Setting your wire speed is kind of an art. When your welding getting the wire speed right all depends on the thickness of the metal, and the amperage you are welding at.
So how do you set your wire speed?
Start by reducing your wire speed a little bit at a time. If you get popping sound you’re speed is to fast. Your looking for a consistent buzzing sound.
If your speed gets to slow your welder will produce more of a spray arc which doesn’t have much sound at all. This is good if you need a deep penetration but this also means you are moving to slow and will have to increase your wire speed.
#4 Clean the Weld Surface
The next tip is to clean your weld surface before you weld on it. How clean the surface is determines how well the weld will look aesthetically and structurally.
Dirt can be anything from dust and grease, rust, and even paint. Not having a clean surface may cause your welder, not to
So how do you clean the surface? Below are a couple of situation and how to clean them.
- Grease and Dust – The best way to clean this is to use some sort of degreaser and a rag get the grease off.
- Rust – If the surface is very rusty you’ll want a wire brush or even a hand grinder. Your welder won’t arc to the metal if it is rusty so you will need it be clean.
- Paint – A painted surface will not arc with your welder and will need to be removed with a hand grinder in order weld the surface.
#5 Check Your Tip
The next issue to check for is the weld tip itself. The tip is keeps your wire straight as it comes out of your weld gun. However their are to main issues with the tip that can cause to mess up the quality of your weld.
First, is the dirt. A lot of times tips will pack up with dirt on the bottom side. This happens because the dirt lands on the welding wire and as it passes through the tip is collected and builds up.
Once the tip plugs up it will cause the wire to get stuck and jolt causing an irregular welding pattern. If this happens simply remove the tip and clean it.
Second, is a worn out
If this happens then then replace the tip with a new tip.
#6 Clean Your Nozzle Often
The next area that could improve the quality of your welds is to clean the nozzle on your welding gun. The nozzle of your welding gun gets dirty over time as you use it.
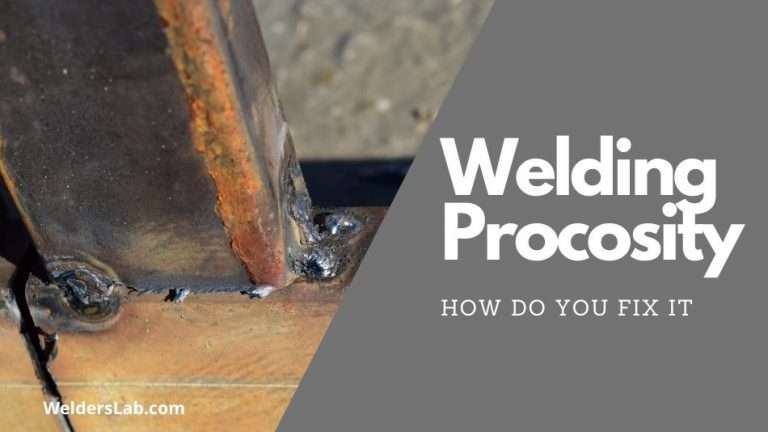
Splatter from the arc will build up on the inside of the nozzle and if it gets bad enough it will restrict the flow of the shielding gas causing the weld to produce pinholes.
If you get a weld that looks like this it will be weak and the penetration will not go very deep.
So how do you fix this?
First, remove the nozzle from the gun by unscrewing it off.
Next, remove the excess splatter with welding pliers.
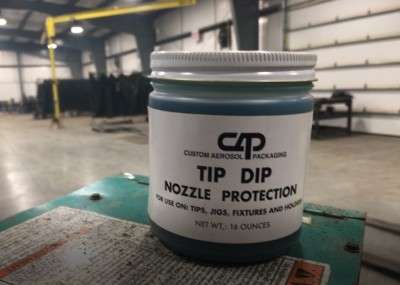
Third, once the splatter is removed put the tip back on and dip the end in some nozzle grease or tip dip. This will coat the inside of the nozzle to prevent splatter from caking up again.
#7 Replace the Liner
This next tip is not one that happens often but when it does can cause a lot of issues and that is to replace the liner in your welding lead.
The lead is the rubber coated cable that comes out of the welder itself. Inside it contains a bunch of copper wires and a metal liner that holds the welding wire.
Like welding tips dust lands on the wire and over time as the wire passes through the lead it builds up on the inside of the liner.
At some
So how do you fix this?
The simple answer is to just replace the liner altogether but if you want to save a few bucks you can remove it from the gun and try to blow air through it. I don’t always find this to work but its at least worth a shot.
#8 Clean Your Diffuser
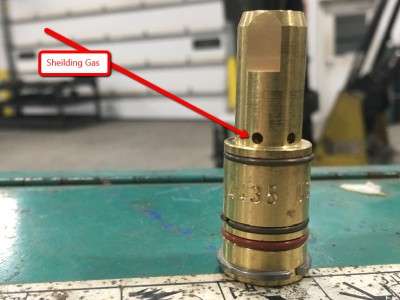
Another part of your welding gun to look at is the diffuser. This is the part that holds the tip and screws on the welding gun. This part helps keep the wire straight as it passes into the tip.
The diffuser also helps bring the gas from the lead into the nozzle. The nozzle to the right is a Bernard diffuser that I use. As you can see in the picture if the holes in the diffuser get plugged up they can restrict the gas flow.
So how do you fix this?
The simplest way to do this is to remove the nozzle and check to see if the holes in the diffuser are clean and not blocked. If they are you can use a tip clean to remove the blocked spots.
#9 Learn the Z Pattern
My next tip to improve your weld quality is to use a Z pattern when welding. The Z pattern is also known as a weaving pattern. This pattern is used to weave between to pieces of metal to create a strong bond and a deeper penetration.
If you do a straight weld, meaning where you weld straight without weaving then you will only penetrate a smaller portion of the metal. If you weave your weld in Z pattern then your weld will cover more of an area tying into more of the metal.
So how do you do this?
Start by placing your welding tip on the base metal. Then hit the trigger to on your welding gun and start to weave the weld back and forth from the base metal across the joint to the other base metal and back.
Continue the pattern until the joint is fully covered and stop welding.
#10 Push or Pull Your Weld
The next tip is to consider if you should push or pull your weld. The way you push or pull y our gun makes a big difference on how deep your weld will penetrate and how it will look aesthetically.
I wrote a complete article on the difference between pushing and pulling your weld here if you want to get into more detail on this topic. However, I’ll give you some of the basics here to help you decide for yourself.
Pulling a weld is one of the most recommended ways to weld because it will give you a deeper weld that will penetrate and tie into the base metals for a stronger hold. It will also give you a taller more rounded look.
If you have a to make a weld that has to hold something then pulling the weld is probably your best bet.
Pushing a weld on the other hand will won’t penetrate as deeply but it will produce a flatter more aesthetically please weld. You might want to use this type of weld if you are trying weld something that has to look nice.
#11 Set the Proper Amperage
Setting the amperage on your welder is also important as you weld. Not have the right amperage set for your welder will cause issues with the type of metal you weld, your penetration, and wire speed.
I wrote a complete article on welding amperage here if you want to get my full take on it.
The main reason you want to have proper amperage as you weld is because it will
You can figure out what amperage you should be welding at by looking at the user manual for your welder or by looking inside your welder where the wire is. A lot of times they will have a chart inside them to tell you just what amperage you should be set at.
#12 Set Your Tip
Another thing to look at is where your tip sets in relation to the nozzle. The tip should not stick past the nozzle. If it does you’ll likely get a weld that has a bunch of pin holes in it.
The reason for this has to do with the shielding gas. If the tip is outside the nozzle it may not be getting enough shielding gas to protect the weld. This will give a weaker weld overall.
The other problem with this is that it could cause splatter to blow back into the welding tip plugging the hole of the tip altogether. I’ve had this happen to me several times and when it does you’ll likely just have to replace the tip.
Another thing to look for is the length of the nozzle. Over time a welding nozzle will become weak and short from continuous cleaning and repair.
If this happens you’ll have to replace the nozzle with a new one.
#13 Make Sure Not to Undercut Your Welds
Another issue to watch out for that could dramatically affect your weld quality is if your weld is undercutting. This can happen for several reasons but it will create a small groove at the toe of the weld.
To fix this issues there are 3 main things you can look at.
#1 Reduce Your Arc Length – If you’re holding your weld gun too far away from the weld joint it may cause this to happen. To fix this try to keep your weld tip around 1/8″ to 1/4″ away from the weld.
#2 Reduce Your Travel Speed – Undercut can also happen if you move to fast with your welder while laying the bead. To fix this cut your travel speed down just let the bead flow evenly.
#3 Use the Right Welding Angle – Finally, holding your weld gun at to steap or to shallow of a weld angle can cause this issue as well. So how do you fix this? This all depends on the type of weld your are doing but in most cases a 45 degree angle works best.
#14 Hold the Right Welding Angle
Speaking of welding angles holding your welding gun at the right angle depending on the type of weld you are doing is vitally important. So here are some common angle to think about.
- T-Joint – A T-joint where one piece of base metal is laying flat the other is sitting vertically you’ll want to hold your gun at a 45-degree angle.
- L-Weld – For a lap weld where one piece of metal laps on top of another weld you’ll want to again hold the welder at a 45-degree angle.
- Butt Joint – This a weld where two pieces of metal are laying flat side by side with a small groove between them. In this case, you’ll want to hold the weld gun so the nozzle is straight up and down to the weld.
- Edge Joint – An edge join is a weld where both pieces of base metal are standing on the edge. In this
case the welding nozzle should be straight up and down to the base metal to produce the best weld.
These are just a few of the joints you can weld.
#15 Know Your Welding Conditions
The final tip is know the welding conditions you’re welding in. When you’re welding indoors in a controlled environment everything will work pretty smoothly.
However, when you’re working outside it can affect your welds in a lot of different ways. Everything from the wind, rain, snow, and cold weather can play a role in how your final weld will look and penetrate.
So here are a few things to consider.
- Wind – If you have too much wind blowing on your weld then it will cause the shielding gas to blow away and won’t let the weld penetrate. To fix this you’ll either have to get something to block the wind or use a flux core wire.
- Rain – Welding in the rain or in a puddle of water is not very safe and not recommended. You could get shocked from the ground clamp or because the metal you are welding is in the puddle of water. Also, don’t weld in a lightning storm it’s not a safe practice and could result in death. I wrote a complete article on welding in the rain here.
- Cold & Snow – Finally welding in the cold and snow is not a recommended practice. The reason is that if the base metal is too cold it won’t allow the weld to penetrate very deep. To fix this you’ll need to warm up the base metal by bringing it indoors or getting the metal up to room temperature to get a decent bead.
In the end if you follow these 15 tips they should help you increase your weld quality today.

