How to Set Voltage on a MIG Welder – A Helpful Guide
If you are not a professional welder, it may be hard to know if your MIG welder is set to the proper voltage. You might find yourself asking the question, “How do I set the voltage on a MIG welder?” If that sounds like you this article will serve as a helpful guide. Keep in mind, consulting your owner’s manual is always a good idea. It will contain the most important information you need to properly set the voltage on your MIG welder.
22 gauge to 14 gauge carbon steel will run between 15 to 18 volts, 1/8″ to 5/16″ will run between 18 to 22 volts, and 3/8″ to 1/2″ and up will run between 22 and 30 volts. The voltage setting will determine your arc length. A higher voltage gives a flatter deeper weld. Less voltage will give you a thicker weld with less penetration.
The following article will go into detail on how to set the voltage on a MIG welder. We will examine what happens if you set the voltage too high or too low. We will cover why to increase the voltage as the weld flattens. There is no one set that fits every welding scenario.
Hopefully, this helpful guide will give you the information you need to get set the voltage on a MIG welder correctly every time.
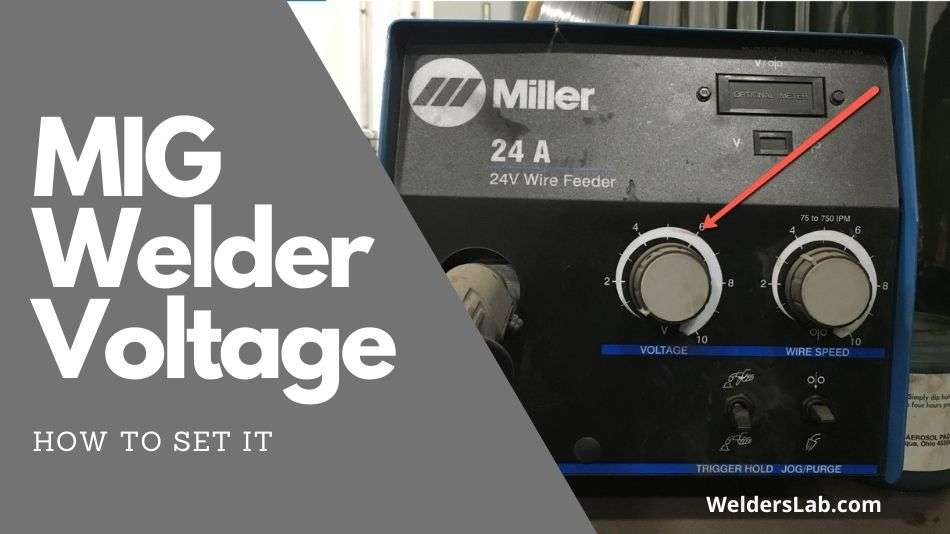
How do you set the voltage on a MIG welder?
The voltage is the main heat setting and it will be adjusted manually. It will change based on the joint, and thickness of the metal. It will also be determined by the type of shielding gas and the position of the weld. It is the most commonly used welder setting knob on your machine in the middle of a job.
Side Note: The general rule is that the thicker your metal is the higher the voltage will be.
When it comes down to it you’ll need more voltage to penetrate thicker metals, but this all varies based on the type of metal you are welding.
There are three main types of materials that are common for welding. Those materials are:
- stainless steel,
- carbon steel,
- and aluminum
Below are the voltage settings for each of these metals. The charts below provide a great starting place to help you as your try to decide what the right setting is for you.
Carbon Steel Voltage Settings
Below is a chart that shows what are some typical guidelines to follow when it comes to carbon steel.
| Carbon Steel | Wire Size | Voltage Setting | Amperage Setting |
| 22 gauge | .030 | 15 – 16 volts | 40 – 55 amps |
| 20 gauge | .030 – .035 | 15 – 16 volts | 50 – 60 amps |
| 18 gauge | .030 – .035 – .045 | 16 – 17 volts | 70 – 80 amps |
| 16 gauge | .030 – .035 – .045 | 17 – 18 volts | 90 – 110 amps |
| 14 gauge | .030 – .035 – .045 | 17 – 18 volts | 120 – 130 amps |
| 1/8″ | .035 – .045 | 18 – 19 volts | 140 – 150 amps |
| 3/16″ | .035 – .045 | 18 – 19 volts | 160 – 170 amps |
| 1/4″ | .035 – .045 | 21 – 22 volts | 180 – 190 amps |
| 5/16″ | .035 – .045 | 21 – 22 volts | 200 to 210 amps |
| 3/8″ | .035 – .045 | 22 – 23 volts | 220 – 250 amps |
| 1/2″ – Spray Arc | .045 | 29 – 30 volts | 315 amps |
Each of these material types will require different amperage. The determination will also be made based on the machine you are using and, in some cases, where you are working.
There are several reasons why the type of material is a determining factor in setting amperage. The most common is ferrous vs. non-ferrous materials.
For instance, the difference between steel and aluminum. Each type of material will have a different melting point. That is one of the keys determining factors of amperage setting on a MIG welder. The decision is also determined by the type of machine you are using.
For instance, when you are using aluminum you will begin to see why. Aluminum typically has a melting point of 1200 degrees Fahrenheit.
Aluminum Voltage Settings
| Aluminum | Wire Size | Gas | Voltage Setting | Amperage Setting |
| 1/8″ | .035 – 3/64″ | Argon | 21 – 22 volts | 110 – 130 amps |
| 3/16″ | .035 – 3/64″ | Argon | 23 – 24 volts | 140 – 150 amps |
| 1/4″ | 3/64″ – 1/16″ | Argon | 24 – 25 volts | 180 – 210 amps |
| 5/16″ | 3/64″ – 1/16″ | Argon | 26 – 27 volts | 200 – 230 amps |
| 3/8″ | 3/64″ – 1/16″ | Argon | 26 – 28 volts | 220 – 250 amps |
| 7/16″ | 1/16″ | Argon | 28 – 29 volts | 280 amps |
| 1/2″ | 1/16″ | Argon | 29 – 30 volts | 300 amps |
Aluminum materials commonly require you to switch between direct current (DC) and alternating current (AC). You will also need a higher amperage because of the higher melting point of aluminum. When determining amperage, you will also need to know the thickness of the material. For instance, ¼ inch material will run on 250 amps.
The starting voltage type will almost always be Direct Current Electrode Positive. What that means is that your handle will be on the positive side of the circuit.
The electricity will flow from the metal to the handle. This setting will rarely change. If you do need to change it, then you must unbolt the internal leads and adjust them manually.
Stainless Steel Voltage Settings
| Stainless Steel | Wire Size | Gas | Voltage Setting | Amperage Setting |
| 18 gauge | .035 | Helium+Argon+CO2 | 19 -20 volts | 50 – 60 amps |
| 16 gauge | .035 | Helium+Argon+CO2 | 19 -20 volts | 70 – 80 amps |
| 14 gauge | .035 | Helium+Argon+CO2 | 20 – 21 volts | 90 – 110 amps |
| 12 gauge | .035 | Helium+Argon+CO2 | 20 – 21 volts | 120 – 130 amps |
| 3/16″ | .035 | Helium+Argon+CO2 | 20 – 21 volts | 140 – 150 amps |
| 1/4″ | .035 | Helium+Argon+CO2 | 20 – 21 volts | 160 – 170 amps |
| 5/16″ | .035 | Helium+Argon+CO2 | 21 – 22 volts | 180 – 190 amps |
| 3/8″ | 1/16″ | 98% Argon/2% 02 | 25 – 26 volts | 250 – 275 amps |
| 7/16″ | 1/16″ | 98% Argon/2% 02 | 26 – 27 volts | 275 – 300 amps |
| 1/2″ | 1/16″ | 98% Argon/2% 02 | 27 – 32 volts | 300 – 325 amps |
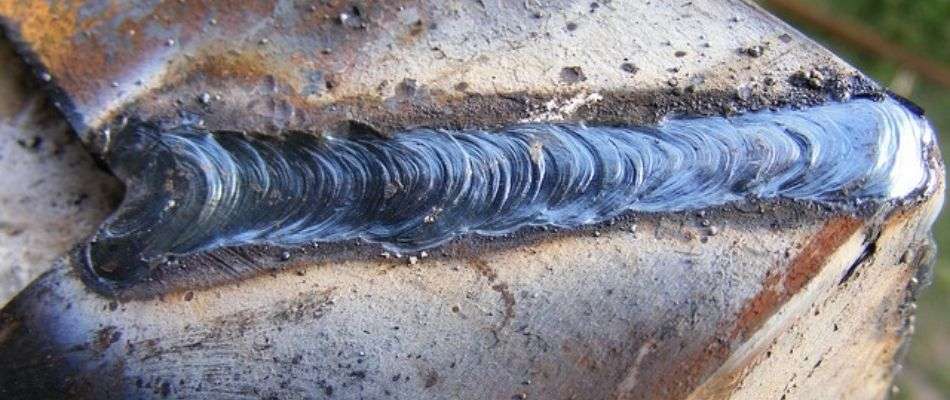
Bear in mind, that the more voltage used the flatter the weld gets. So, depending on your requirements you will adjust the voltage accordingly. That is why we say it is the most commonly used knob on a welding machine. Pretty cool, right?
The voltage setting will also change depending on the size of the electrode that you use and the type of gas you are using. MIG welders are usually CV (constant voltage).
The voltage will probably not fluctuate much. But if it does, this article might be helpful to you.
What happens when you set the voltage too low?
Setting the voltage too low results in a poor arc start. It also will affect the control and penetration of your weld. It could also create excessive spatter which can be a safety hazard.
Another problem with too low voltage is that it could result in a convex bead profile. It may also create a poor tie-in at the toes of the weld.
The weld also will not penetrate as deeply as you will want it to. This could result in a weaker weld. It may also make the weld stand taller or thinner, another thing you do not want when you are MIG welding.
Therefore, it is important to maintain the voltage in accordance with your project requirements with sensitivity to the materials in use.
Sometimes you will hear a popping sound. Depending on your circumstances this could result in a terrible-looking weld and make the welder sputter. Always make sure you are using the correct voltage on a MIG welder.
As you can see, if the voltage is too low, you can experience problems that will make your welding difficult. You can see how it may affect the control and penetration of your weld.
You can also see that it can create an increase in spatter which could pose a danger to your welding area.
What happens if you set your voltage too high
Another question people ask when they set the voltage on a MIG welder is what happens if you set your voltage too high?
This can be a problem for a few reasons, and we will address them now. Remember, welding voltage is primarily to control the arc length. The arc length is the distance between the pool of molten metal and the wire at the point of the arc.
If you hear a slower popping sound it is often based on the wire feed. However, in some cases, it is because the voltage is too high.
This leaves you in a state of no control over the spatter that may come. Spatter can be a dangerous thing. Reduce the voltage and you will have more control over the weld.
You see, the weld will get wider and flatter if you have too high of a voltage. The result will be an unattractive weld. Be sure you keep an eye on everything so you can adjust the voltage as necessary.
Using too much voltage could cause burn-through. That is because it causes the insulator to stop insulating. It is getting too much current and causing damage.
You will get dielectric breakdown resulting in arcing that causes heating, pitting, and in some cases, burn-through.
As was stated previously, voltage controls the arc length between the pool of molten metal and the wire point. This distance affects the entire welding operation.
Too high a voltage may cause you to lose some control over your weld. It could also cause burn-through, heating, and pitting in the final weld.
Always try to remember the importance of maintaining your voltage so you can remain in control of your weld and your welding project.
Final thoughts
Voltage determines how high and how wide the bead is. A lot of welding machines will have a chart, manual, or specific notations available for setting voltage. You may also be able to find the correct voltage chart on the company website of your machine.
There is no one set that works all the time. Depending on the thickness of the materials, the job site where you are working, and what type of project you are working on, the voltage and amperage can change.
Your materials (carbon or stainless steel, aluminum), the thickness of those materials, and the melting point of the materials will all be included when you are determining the voltage.
Changes in the bead as you weld will make for on-the-fly voltage adjustments. You will have to make these adjustments so that safety remains the utmost important part of the equation.
In other words, base your voltage on what you are welding and adjust accordingly. Listen and watch closely as you weld. Observe the bead, keep your eyes open for splatter, and listen for popping sounds so you can adjust to the circumstances of the project. Recognize when the situation is getting off the path you have set for the project and make the necessary corrections.
While it is true that if you are not a professional welder it may be hard to know if the voltage of your MIG welder is set properly. Hopefully, the question,
“How do I set the voltage on a MIG welder” has been answered for you. Maybe you have learned that joint design, materials, and position will play a part in your settings and the results you get when you are welding.
How thick the material you are using will determine the voltage used and the amperage. Always practice safety first, stay up to date on the latest technology, make sure you have a good understanding of your voltage, and you will be successful at your welding projects.