How Do I Change the Wire on a MIG Welder
One of the very first things I had to learn as a welder was how to change my wire on a MIG welder. Just like changing gas tanks on a welder, if you’ve never done this it can be a little challenging but once you do it a few times it’ll be one of those welding skills you’ll never forget.
How do you change the Wire on MIG Welder? First, you will need to remove any excess wire in the welding lead. Next, remove the spring cap that holds the spool on the welder. Third, feed a new spool of wire into the welder and run it all the way from the lead to the weld gun. Finally, put the spring cap on and check your wire tension.
This article is going to teach you how to load a wire feeder. Whether you want to know how to change the wire on a MIG welder or how to reload a MIG welder, we can teach you.
Why Change the Wire on a MIG Welder
There are a lot of reasons to consider changing the wires to a different type in a welding machine.
You want to know the reason you’re changing and what to look for and make sure that you are sourcing material from someone with the expertise to help you.
#1 Need a Different Type of Wire
One reason you will need to change wire is if you need a different type of wire. For example, if you are you a regular steel wire and you need to weld stainless steel then you will need to switch to a stainless wire.
A good rule to follow is that whatever type of metal you are welding should be the same type of metal you are using as wire to weld with.
#2 You Run Out
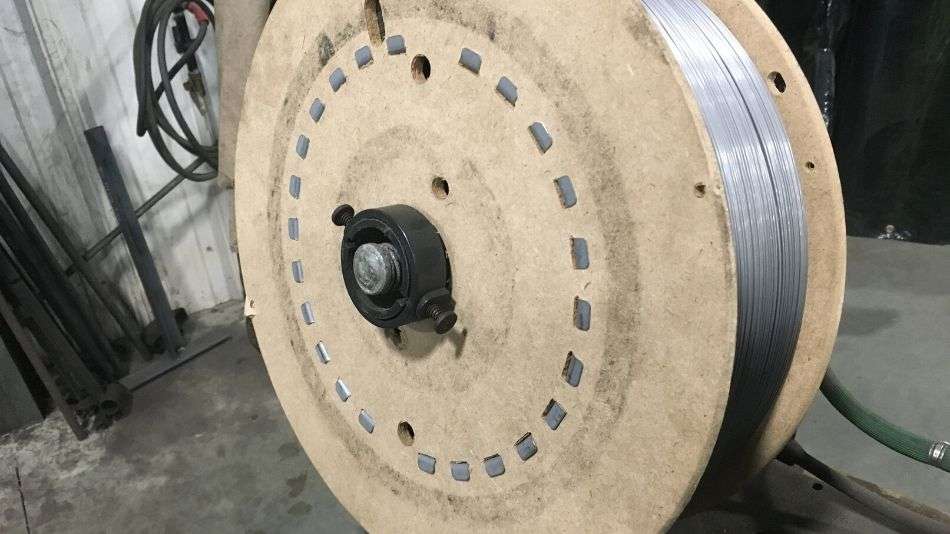
The most common reason you need to change welding wire is that you run out of wire. Welding wire is a consumable like most things on a welder it will need a replacement spool to keep welding.
In my shop, we use 60 lbs spools which tend to go a long way depending on the amount of welding being done.
#3 Improving Quality
Another great reason is to improve your quality. Some welding defects are caused by using inferior wire.
This may result in jobs that need to be regularly reworked. If your wire has low levels of diffusible hydrogen then it will crack far less frequently and your weld will be stronger.
A good example of this for us is that we use a noncopper coated wire. Copper wire tends to be a cheaper wire and causes more issues with our liners plugging up.
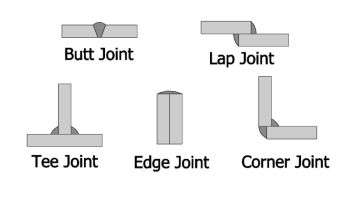
Choosing the Right Consumables and Components
There are different techniques when it comes to welding. Changing settings like voltage, amperage, and the type of wire you use has a huge impact on the consumables you choose.
To choose the right drive roll, you need to know the wire you’re using. Softer wires, like the flux and metal cored wires, need a knurled drive roll. This roll can grab the tubular design with the extra teeth, giving it the boost it needs to feed through consistently.
With solid wire, these knurled roles will strip the wire and create problems in the liner and the feed process. For these, you will need to use the gentler grooved drives.
Tools
Here are a few tools you will need to get the job done.
- New spool of wire
- Sharp welding pliers
- Small screwdriver
Preparing the MIG Welder
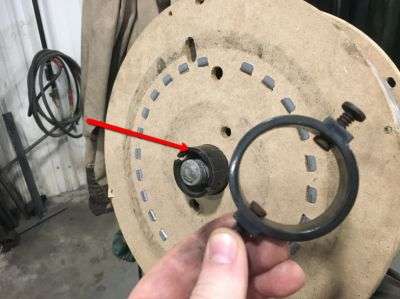
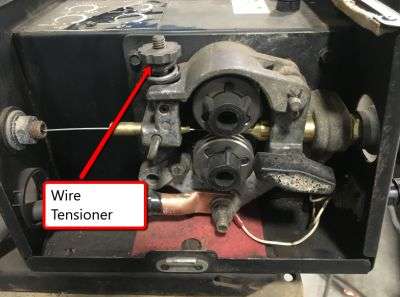
#1 Check Spring Tension
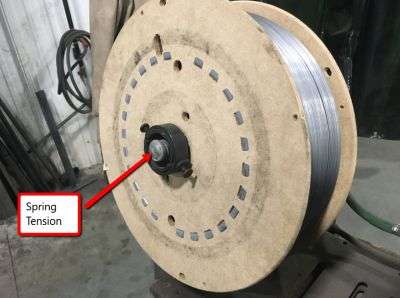
The mounting wire reel always involved a spring tensioner.
This spring tension needs to be tight enough to prevent the wire reel from unraveling when the spring tenses.
#2 Get the Wire Straight
You need to pull the first 3 inches of wire as straight as you can get it.
This will drastically reduce the likelihood that the liner will become damaged or the wire will snag when the wire gets fed through the liner to the weld gun.
#3 Trim the Wire and Hold On To It
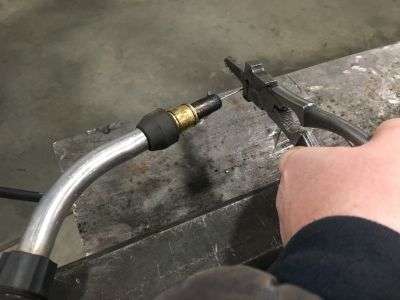
You will trim your wire with the wire cutters.
Whatever you do, you need to keep your fingers on the wire. Do not let it go. If you drop the end of your wire, then it will unravel and get really tangled.
You can use the piece of wire that you removed at the start of the process to do this, but it’s easier if you use a small screwdriver instead.
#4 Check The Roller Grooves
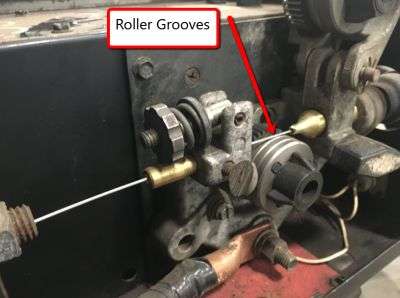
The roller will usually have a couple of grooves. You can secure it into its place using a grub screw. Each side should have a grub screw in the roller.
For knurled rolls, there will be a plastic cap. Make sure not to get any grease or rust on the wire. This will make the rollers less effective ad force you to clean your rollers with a dry cloth before restarting the process.
#5 Feed the New Wire In
Next, you will push your wire into the liner for a couple of inches. Replace the tensioner clamp. Net, you will turn the welder on and use its built-in wire feed mechanism.
This will push the wire through the liner. Keep your MIG torch as straight as you can. It needs to remain straight all the way through the torch to eliminate the possibility of the end wire catching the inside of the liner.
Removing the contact top from the end of the torch before you feed the wire through might help. You can secure the gas with spring and remove it by twisting and pulling it in a clockwise direction.
Quick Tip – The tip can be screwed or unscrewed, but don’t do it while the tip is hot. This might strip the thread or break it.
If your wire snags in the torch, you can withdraw the wire a little on the reel and rotate the torch. Otherwise, you will have to completely restart.
Roller and Reel Tensioner Settings
Friction is what you use to feed the wire through the drive roller. A lot of the problems that hobby welders face are a direct result of the tensioner being poorly installed.
Make sure you do this part exactly right. Make sure you take care so the lifespan is prolonged.
If you fully tighten the tensioner, you will cause a lot of problems. The mountings will end and the tensioners may snap.
The motor gearing can also have problems. The motor could get sheared if the wire gets stick to the tip when you weld. Use the minimum possible amount of tension.
If you want to learn how to properly judge the tension of your wire feed, Lightly grab the wire and hold it between your fingers, then go ahead and squeeze the gun’s trigger.
You need to be careful with this method. If the wire reaches the clamp, you will create an arc and burn your hands and eyes.
Start with only a small amount of tension on the wire feed mechanism. Slowly increase the tension until you reach the point where the wire feed stops slipping, but don’t hold the wire tightly enough to slow down the motor. Ideally, the wire will move into the rollers before the motor stalls.
You also need to check the tension on your wire reel. The purpose of the reel is to prevent your wire from getting tangled because it’s too loose.
That being said, it needs to be as loose as possible, otherwise, it will create problems that prevent the wire feed mechanism to send the wire through the gun when necessary.
To get the right tension, you need to set your wire feed speed to the highest setting that you are likely to use when working.
Squeeze the trigger on your torch. If the tension is set correctly, your wire reel should be able to stop without getting tangled or unraveling itself when you let go of the trigger.
How to Avoid Common Problems with Wire Feeders
The most common cause of problems in the wire feed is a result of using welding wire that is rusty. Rust is a lubricant. When it hits the drive rolls, it causes them to slip. It’s also abrasive on the liner itself, which makes issues with resistance and creates abrasion on the wire liner.
If you leave the wire in your welder between jobs, you are asking for some rust. The reason the wire rusts quickly is because it stays inside the welder too long.
The wire needs to be removed and stored somewhere that it won’t rust when you aren’t welding. This preserves the wire, the liner, and the welding gun from being destroyed before their expected lifespan and requiring costly repairs.
Conclusion
Follow these tips and you will have no problem changing the wire n your MIG welder.
Whether you’re putting in a new spool or changing the wire entirely, this article had plenty of different instructions to answer a variety of questions.