How Do You Change the Liner in a MIG Welder
Having a quality liner is very important. A lot of times, liners can make or break the performance of your MIG welder. Occasionally, you can simply clean the liner to improve performance. If there’s a little bit of buildup or drag, that’s a cleaning fix.
Unfortunately, MIG welder lining is a consumable. Eventually, you will need to completely replace it. Whether your line kinks or simply wears out over time, you should also know how to replace your MIG welder liner.
How do you change MIG Welder Liner? First remove the old liner along with the welding wire, nozzle, tip, and diffusor. Next, remove the old liner and then feed in the new liner. Once the new liner is in trim the liner to around 3/4″ where it comes out of the neck of the weld gun. Finally, reattach the liner back to the welder and put the nozzle, tip, and diffusor back on the weld gun.
The good news is that it’s actually pretty easy to manage. You can easily change your own liner with just a few simple steps. This article will teach you everything you need to know about changing your MIG welder’s liner.
Keep reading to learn why you need to change it and how to do it.
3 Reasons to Change the Liner
#1 Plugs Up With Dirt
One of the main reasons to change the liner is if it gets too dirty. Liners are consumables, so even if you clean them regularly, they will eventually have too much metal dust built up along them to be useful.
This is a reason that you will need to change it.
#2 Develops Kinks
If your liner develops any kinks, you will immediately need to change it. No amount of cleaning can repair a line that has a kink. When lines develop kinks, they are unable to be fixed in any way.
Kinking causes bird nesting in your lines and prevents them from moving smoothly into position at the tip of the gun.
#3 Increasing Performance
One good reason to install a new liner the right way is to make the MIG gun work at its optimal performance capacity. When MIG welders have problems with the liner, they stop functioning.
Whether it’s a wire that wanders too much, birds nesting in the wires, or other problems, it becomes impossible to operate your machine.
It will provide low-quality welds, overheat and end up with downtime, or stop functioning in any capacity.
How do you change the liner in a MIG welder?
The process for replacing the MIG liner is relatively easy despite it being so critical for a smooth operation of your MIG welding gun
. Here’s the process for anyone wondering how to change welding liners.
How to Remove a MIG Welder Liner
#1 Layout the Weld
The first thing to consider is how you layout your gun. You need to make sure that your gun is straight and the cable remains flat.
When your gun is in this position it will be much easier to feed your liner through without kinking it and ruining it.
#2 Remove the Nozzle, Tip, and Difusor
You also want to move to the front of the gun and trim off the wire. This will remove the bead of the molten wire that has formed after the welding process.
You also need to remove the consumables from the front end of your gun. Removing these consumables will allow you to feed your liner through the gun.
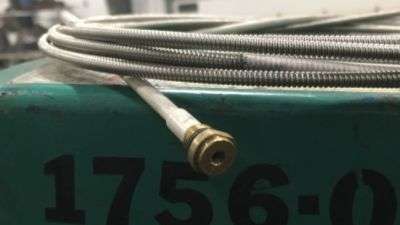
Finally, you’ll want to remove the liner nut to loosen the liner from the machine.
#3 Remove the Power Pin
You also want to remove the power pin at the back of the gun from your feeder. Make sure you cut the wire.
This snip will allow the old liner and wire to be removed from the back of your gun.
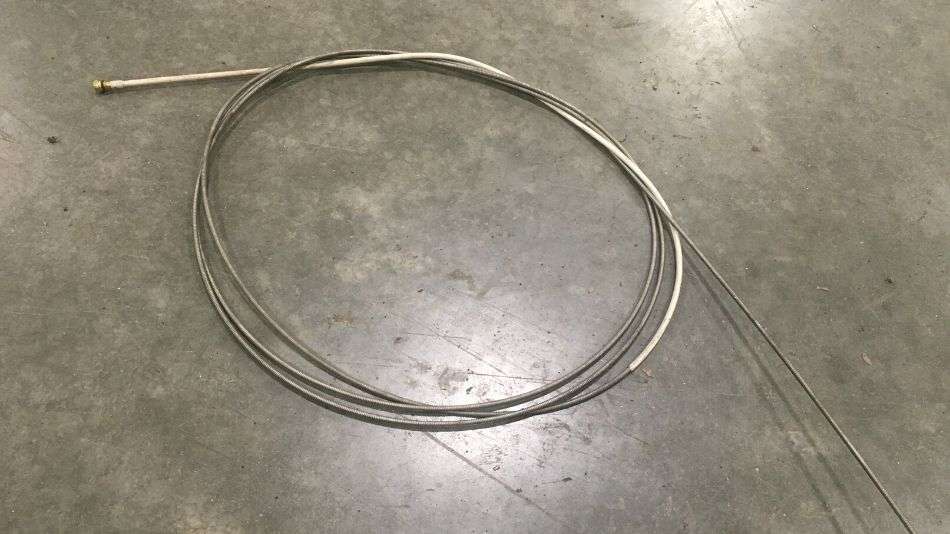
Front-Load Liners
For liners that load in the front, you will have a wire that is coiled. You should unravel it first.
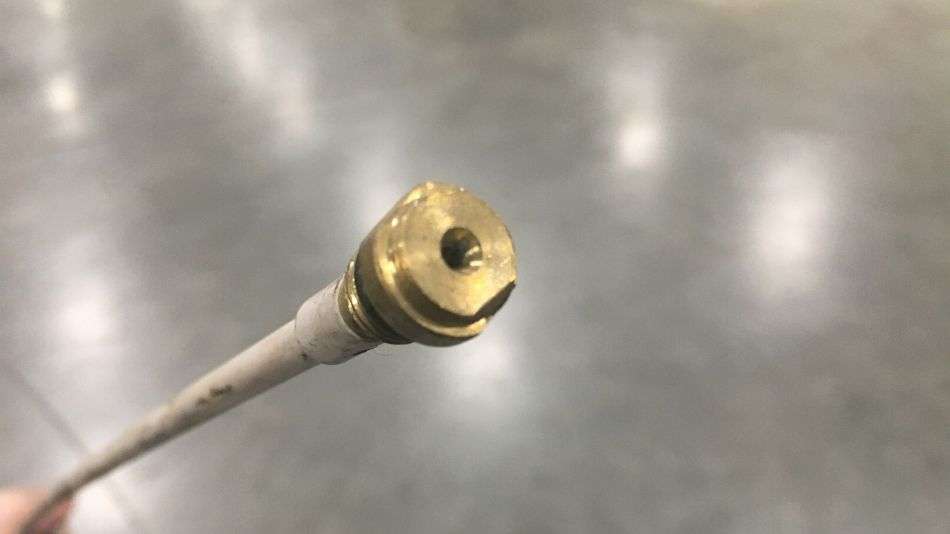
One end of it will be made from brass. This end is what goes into the back of the gun, which should have a receiver for you.
This will then get fed over your wire and up through the neck of your gun.
How to Replace a MIG Welder Liner
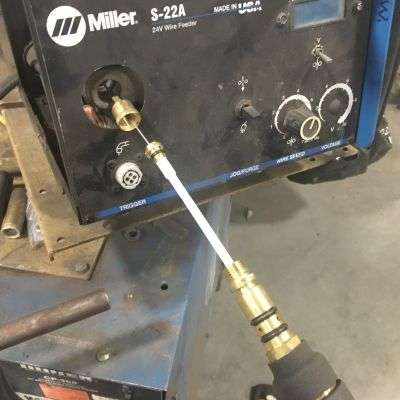
#1 Start the New Liner
How do you change the liner in a MIG welder? Once you’ve removed the old liner, you can start to install the new one.
Feed your liner through the backside of your gun. You then thread it into the power pin.
#2 Reattack the PowerPin
Next, put the power pin back into the feeder, making sure to feed a few inches back through the back of the pin.
This will make it much easier when you finish because the wire will already be installed inside the gun and waiting for you to pull it through the cable.
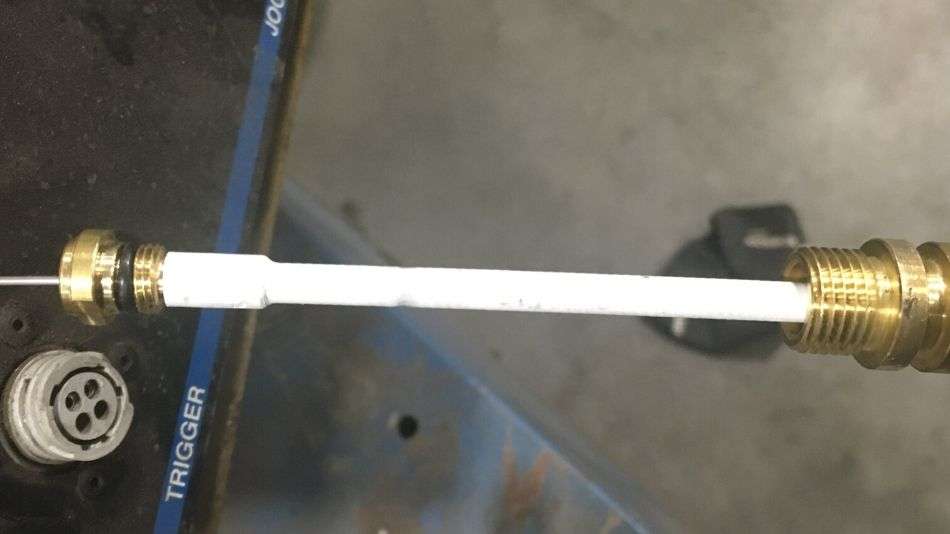
#3 Trim Your Liner
The liner is almost always much longer than the gun itself because it is manufactured fr multiple different gun and cable lengths and models.
This means that you will have some liner sticking out of the front of your gun when you finish, which you will need to trim down to fit the length of your gun.
Some of these liners may include a liner trim gauge for your convenience. This gets fed over the liner at the top and will need to be pushed evenly with the neck.
This lets you trim the liner to the end of the gauge. If your kit doesn’t have one of these, then check your MIG welder’s manual for the right length to trim it to.
#4 Feed the Wire Through You Liner
Finally, you’ll want to feed the wire back into the liner. To do this simply get it started in the feed rollers and hit the trigger on the welding gun to feed the wire through the new liner.
Quick Tip: Turn off your welding gas as you feed the wire through to conserve gas.
You can turn your wire speed up at this point to feed the wire through the lead faster. Just make sure to turn it back to your normal settings before you start welding.
Front-Load Liners
Again, for liners that load through the front, you have some different directions.
#1 Feed the New Liner In Place
Feed your liner slowly through the front of the gun. You will need to do this in short and slow movements, a little at a time. Otherwise, you will end up with kinks.
The liner should click into the right place with an audible snap when your receiver hits the power pin. When that process is done, you simply put the gauge on top of your liner and trim it the same way.
#2 Snap the Power Pin Into Place
If you have a spring loading module then you won’t have a power pin receiver in the back. The receiver is just built right into the module pin. Just feed the liner into the gun.
Use very short strokes. The liner will then meet up with the receiver inside of the gun, with the power pin. Then, you will be able to feel it spring backward towards the gun’s front end. This will make sure your liner is engaged correctly.
#3 Trim the Liner
Next, you place the liner gauge over the liner until it becomes even with the neck. Then, you will push your liner backward. You want it to bottom out into the module, so you can trim it evenly with the end of the gauge.
After that, you can remove the gauge and release the liner. The liner is going to spring right back out and it will stick out of the neck a little, probably around 1 and ¾ of an inch.
This is normal because the consumables will compress it and put it back into its position.
#4 Add the Consumables Back On
Finally, once the liner is secure you’ll want to add your diffusor, weld tip, and nozzle back on your gun.
Frequently Asked Questions
Although the process of lining a MIG gun is easy, there are a lot of questions involved.
Here are some of the more common questions and their answers.
How long is a new liner good for?
This question is tricky because there isn’t really a single answer. The longevity and life span of a new liner varies based on how you handle your machine.
Let’s look at some of the things that can detract from the lifespan of your liner.
Dirt is a big factor. When you allow dirt to built up then you will decrease the life expectancy of your liner.
When dirt builds up, it leads to wire problems. Kinks will immediately end the life of your liner.
If your liner gets a kink, then you will need to immediately replace it because it can’t function anymore.
Side Note: In my weld shop dirt is everywhere. You can’t escape it. However, I find putting an old shirt or clothes pinning a piece of cloth to the welding wire can help prolong the life of the liner.
Another thing that can detract from the life expectancy if your liner is if you’ve got it too tight.
When your drive rolls are tight it can cause excessive premature wear on your liner. It will end up putting grooves in your liner.
When liners are not sized correctly for your wire, it will also cause problems. When a liner is too big for the wire, it will cause the wire to drift along the wire.
This leads to excessive wear on the liner, too, causing it to give out before it should.
What if the wire gets stuck in the liner?

If this happens to you, then you can try to slowly push it through the liner or back it out of the liner.
Hopefully, this can fix your problem. Remember to work very slowly and avoid touching edges more than necessary.
Unfortunately, if you’re unable to move the wire there isn’t really anything you can do and you will need a new liner.
Remember to always move very slowly because you don’t want to cause kinks in the line. That will make it toast regardless of whether or not you can get the metal out of it.
To help prevent this situation from happening, try to catch the wire before the end of the feed so you can pull it out and replace it.
Conclusion
Have you ever changed a liner in a MIG welder? As you can see, it’s a normal part of the welding process.
Knowing how to change your own will save you quite a bit of money. Happy welding!