How to MIG Weld Large Gaps – A Beginners Guide
One of the hardest things I’ve had to learn as a welder is to MIG weld large gaps. I’ve had to do this a lot over the years and learning the exact process can be tricky especially if you don’t know the exact process you should follow.
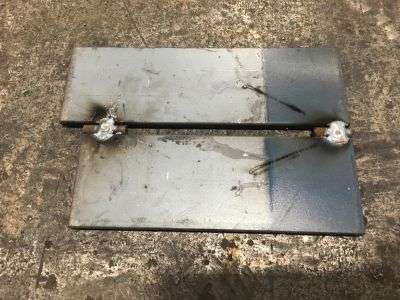
How do you MIG weld large gaps? There are 2 basic methods to MIG welding large gaps, the first is to use filler metal to help cover the gap that is cut to size to fill the gap and help make the weld a smoother process. The second is to do a root pass to fill the bottom of the gap and use stringer beads to fill the gap.
Overall I’ve used both of these methods depending on the situation and the type of metal I’m working with. In the rest of this guide, I will share those processes and everything you should know about welding large gaps.
Why do you get large gaps?
A lot of larger gaps occur because metal warps and pulls apart when it gets treated with heat. If you fail to clamp it together properly or tack it down, you may find yourself with large gaps to fill when it comes to welding.
It also happens when pieces don’t line up well. If you have cut your pieces wrong or measured them wrong, then you may end up with a large gap.
These gaps can be extremely problematic. Skipping the beveling process can also lead to larger gaps that will need to be filled on the job.
Why are large gaps a problem?
There are a few reasons why large gaps can be problematic.
#1 The Weld Is Not as Strong as the Base Metal
Large gaps are problematic because they are not as strong or solid. The filler metal is never as strong as the base metals. It is meant to fuse two pieces of metal together into one solid piece.
When there’s a small seam to fill, it requires very little of the weaker filler metal, so as long as you penetrate into it, the job can handle the stress with the strength of the base metals.
With large gaps, you are relying on the strength of the filler metal to keep things together, instead. Filler metal was never meant to bear that much of weight and stress in a joint.
It is nowhere near as strong or well constructed as the base metal, and having such a large surface area means it will need to bear more weight. It also reduces the combined strength and tension of the original base metals.
#2 A Large Gap Is Highly Susceptible to Contamination
Contamination is pretty easy with welding projects, and a gap that large has a lot of space for contaminants to creep in and degenerate the strength of the weld.
On top of that, it will require multiple passes and the penetration won’t matter as much over such a widespread, which will cause problems with the integrity of the joint.
#3 Can Affect Joint Performance
Large gaps can also affect the way a joint performs or sits. For example, if you are making tables, then having a large gap could affect the table’s stability.
If you weld the large gaps differently, then the table may rock unsteadily with different leg lengths and angles, or the surface may not be perfectly even and things could slide slowly off the table.
#4 Can Cause the Metal to Wrap
Another issue with larger gaps is how the metal will warp. When you have large gaps that do not fit together well, the metal is more likely to warm when the heat is applied.
When metal gets heated, it tends to pull and warp, and welders are often using clamps and tacks to prevent this from happening.
A large gap would prevent an effective tack, and cause the metal to further deviate and degrade, making it unlikely that you can fuse the gap and weld the pieces together.
In structural welding, gaps are massive problems. Any heat put in when filling the gap will cause distortion in the metal. I a structure, this may cause your form to take on a tension that it was not designed to handle.
When you simply fill in the gap it twists the beam, causing the entire structure to be under tension constantly and causing rapid erosion and every joint to be misfitted.
Weld Large Gaps: What kind of gaps will you have to deal with?
When you’re dealing with welding gaps, the typical gaps you will find are…
- corner gaps
- sheet metal gaps
- and trying to fill holes caused by drills and burn through
These gaps are all different types and require different techniques to fill correctly.
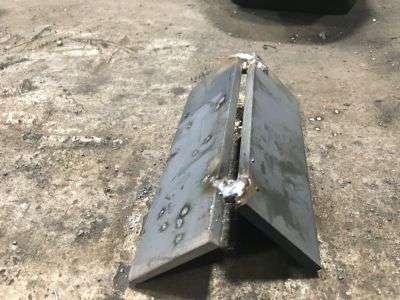
Again, it is not recommended that you weld this way. Whenever possible, you must grind, cut, and bevel your way into a flush weld instead of having a gap of any kind.
It is possible to butter larger gaps before your final weld to prevent the extra stress that could result from welding massive gaps. Just be sure you correct them according to their needs.
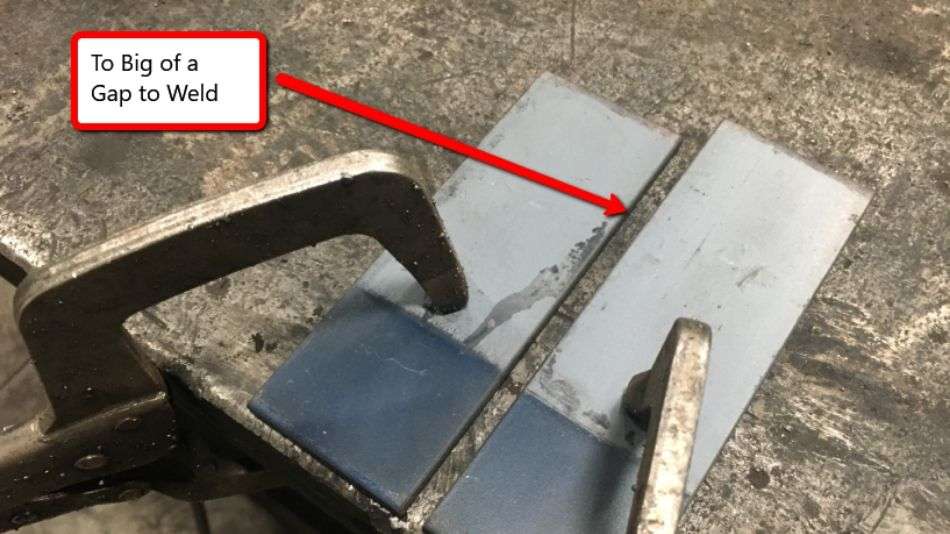
Side Note: You should never attempt to bridge a large gap in a single pass.
For openings greater than what is allowed in the code but not more than twice the thickness of the thinner piece, you can correct the gap by welding it into acceptable dimensions before you weld the joint itself together.
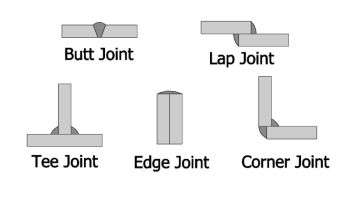
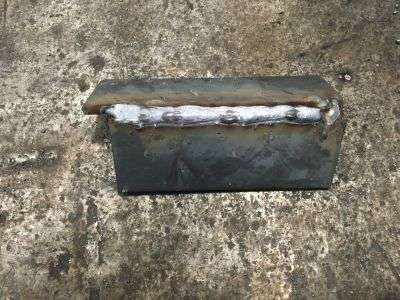
Corner Gap
Corner gaps are when your corner pieces do not fit together in a flush way and you need to add tons of filler metal to fuse them together.
I find this happens to me a lot when I do miter cuts with tubing and pipe and they just don’t quite come together in the right way.
It can be tempting to fill the corner with weld beads but that isn’t always a great option.
In the case of corners, it can often be easier to cut the pieces again so that they meet at 45-degree angles to form a 90-degree angle instead of trying to fill a large gap.
Sheet Metal Gap
A lot of novice welders have heard that leaving a gap between sheet metal pieces equal to the metal’s thickness is ideal for welding. This is not so.
Welding will pull gaps closed as you perform it, which will warp the metal and cause waves when such a large gap exists.
When you put the sheets flush to each other, you can seamlessly fuse them together.
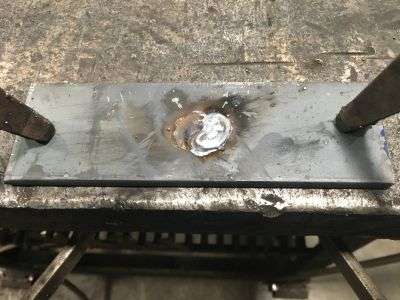
Burn Through and Filling Drill Holes
This final gap is to fill a burn-through spot that has been drilled out.
Burnout can happen for a lot of reasons. This typically happens to me when I’m welding too hot on thin material. I recently had to fix a few Stainless Steel pig feeders and dealt with this issue quite a bit.
Since the material was so thin I needed to cut my amperage back and make a small stitch weld to help fill in the spots.
Filling unwanted drill holes can be fixed in the same way. However, if the hole is too big you may have to find a slug of metal to help fill the gap.
How to MIG Weld Big Gaps: Different Ways to Fill and Weld Big Gaps
There are several different options for filling large gaps.
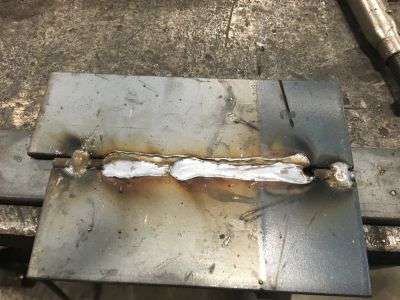
One of the most common methods that welders teach is by laying down several welds on top of one another until the beads form a mound that reaches over to the other piece.
This stacking method allows for reasonable penetration and often feels stronger than alternatives, and can be ground down after the project.
Another method teaches people that you can tack the piece in the same spot several times until the tack builds a line across the gap. This is nowhere near as secure, and not at all recommended. This is a quick fix that won’t offer a strong weld.
Some welders will try to fix the gap by superheating the beam upwards in a direction that runs away from the weld. This will expand the beam, which will hopefully reduce the gap that you are working with to a manageable size.
If the gap is still too large, then tack weld a backing strip onto it and use beads in a weave pattern that pushes the slag into a position to act as a barrier between the strip. After the weave finishes, you can get rid of the backing strip, grind it, and finish with a back weld.
Padding
Padding is a form of laying down welding beads that are filled with intention.
In fact, padding coasters and cooling pads to stick hot pans onto counters is a great way that a lot of beginners to practice padding when it comes to welding beadwork. Padding does not take a lot of metal and doesn’t require tons of preparation time.
This is a form of welding that allows you to learn to bead so well you can do it in your sleep because it constantly lays bead after bead down over and over beside themselves in intricate patterns.
A lot of welders will use this technique to bridge large gaps. Instead of simply laying down a few beads in a narrow space, they will create rows and rows of padded beads until the gap is completely filled.
Pad welding as an exercise often involves trying to weld a couple of pieces of metal together and then break them. When padding is done incorrectly, it will be easy to break the metal apart again. This is why, as it has been covered before, you can use this method to fill gaps when welding but it is not even close to the strength and integrity of a properly fit weld.
To set up a pad, grab a piece of material and prepare it. Your process will be to lay multiple beads very close to one another.
Make sure that you are creating what will look like woven metal yarn or rope. The beads should be very tight and stacked, and the rows should wind tightly against one another.
Filler Rod
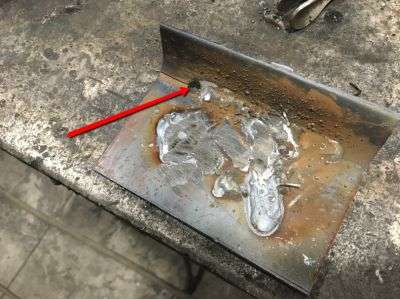
A lot of people will use a filler rod for this. The idea is that you can tack in a bar stock to help fill the gap in the weld. Taking a steel rod or appropriate grade is used by some people to fill the joint quickly.
Unfortunately, this is not good practice. It is almost impossible to maintain consistency when you are penetrating the joint.
If you do use this method, then you want to leave a shim exposed when you weld. Fillet the plate to the shim and the shim to the column instead of just melting the shim to form a bridge. If the shim has been held properly, it will work in a pinch despite being bad practice.
If you want to use filler rods with MIG welding, then you just need to prepare them properly. You will need to hammer off any of the flux that is lingering on the rod before working with it. Once you complete that, it will make a decent filler for your large gap.
Unfortunately, if you are not careful with this technique you will end up with a mess. Cramming the filler rod into the puddle will cause your weld to look terrible.
On top of that, it will flood everything while simultaneously making it all too cold to work with and flow. It is not a great way to do things and does not offer great penetration either.
How to MIG Weld Large Gaps the Right Way
For those of you who do not have the option of rejecting parts or telling the person who asked you to perform the job that the gap is unacceptable and the weld won’t work properly, you will need to find a way to, as they often say, “just make it work.”
Unfortunately, for a lot of people, when a client says this they still expect it to work… perfectly, no matter how many times you warn them about the consequences of trying to weld such a large gap. Here are some things you can do to mitigate the issues for your smooth and clean weld.
Make sure that you have followed all the usual safety precautions. You should be using a darkening hood or helmet, long gloves, thick and flame-retardant clothing, goggles, and earplugs. It is important to protect yourself from any flying sparks and to prevent your eyes from ending up with retina burns from welder’s eye.
Make sure you’re grounded properly, and that your machine is compatible with your home circuit. Ensure that your welder has been set properly for the metal thickness and that you have the correct drive rolls installed for the wire you’re using. Check your feed speed and prepare.
You also want to prepare your metal. Remember, any dirt, rust, oil, paint, or other problems on the surface of your metal will contaminate your weld. When you have a gap this large, it becomes even more critical that your metals are perfectly prepared and that no contamination is present.
One thing you can do to help fill gaps is to take care of how you handle them. You should concentrate on controlling your heat well. When the heat is on the radius edge instead of the cut edge, you will get better results.
Adjust your position to allow for the radius to be on top and the cut edge to be on the bottom so that you will also have gravity on your side when filling the gap.
This will allow your puddle to run down and into the cut edge without you having to concentrate your arc over the edge and risk burning through your metal.
Make sure that you begin building your molten weld puddle up on the side of your weld that is going to end up seeing the highest heat levels, then draw it over the gap and to the other side using quick whipping motions. It will help you to build up multiple passes along the edge of the radius after you’ve run a quick pass down through the cut edge to keep it from burning out too much.
From this point, you will start to work with your electrode. You will need to use the electrode to push your weld puddle. This requires you to work in a whipping motion.
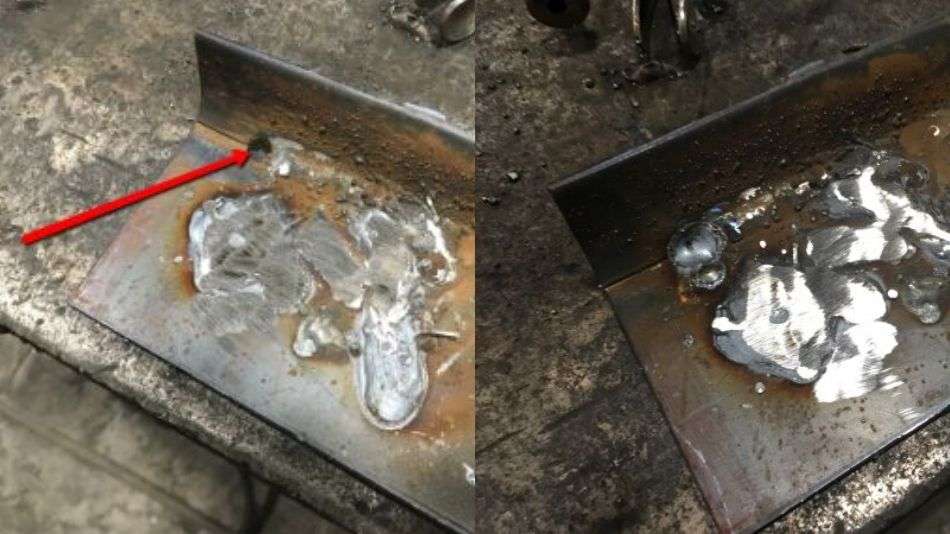
Quick Tip: If you start to burn through the metal, stop, let it cool, and jump ahead in your work. You can come back later, once the area has had time to cool down a bit. Jumping ahead and then welding back to the spot in short beads can work.
If you do end up burning through, you can fix the hole most of the time. Just make sure that you build up your molten puddle on both sides of the bu through and draw metal into the hole from the pool with your electrode.
If this process fails entirely, then you can smash the slag from another filler rod into the puddle with your free hand to create more filling. If you weld it poorly, then grind it down, burn it out, and make another pass to create a better weld with deeper penetration.
If you still experience some problems with this method, then go back and lay down some tack. Pretend like you are doing bodywork and make sure that you put down strong tacks in some great places.
When you stack your tacks, then you will create a strong enough foundation to begin welding through and closing that gap.
Corners
Use short bursts when you weld. Working in short bursts will form a bridge between both pieces of metal. You also need to ensure that you leave enough time between your welds for the metal to cool down.
Be sure that you practice this technique before using it on anything important. Without the practice, you will not be able to control the heat and may end up burning through the base metal, which will completely ruin your weld.
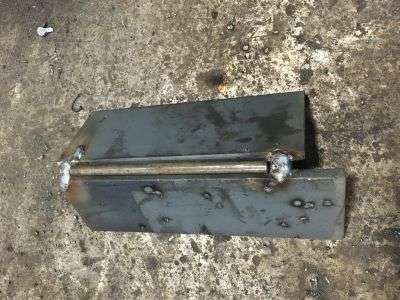
Once you finish this process along the entirety of the gap, you’ve completed the weld. Make sure that you’re getting the proper penetration, especially with larger gaps. Once you finish, you will need to clean up any slag leftover and grind it down to a smooth weld.
Welding corners is really about moving quickly and ensuring proper settings. Control your heat and wire speed. If you want flatter beads that will do a better job covering your gap, then you will want to use the push method rather than pulling (or dragging) your pool toward yourself.
Make sure to lay down some tack every few inches, stringing some tack along until you’ve created a bridge in the gap that you can then form weld beads and stacks over and through. Stay ahead of your molten puddle and make sure you move quickly enough not to burn through your metal.
Holes
If you have a gap because you drilled a piece incorrectly, and need to fill in one of the holes, you can do that, too. Get the piece on its edge so that you can use gravity to your advantage. As you weld, gravity will pull the metal along your weld when it’s tipped up on the edge.
Make sure that you are constantly moving from side to side. You need to maintain strict control over your heat to avoid burning through your metal and causing even more problems with the weld integrity.
Sheet Metal
For gaps in sheet metal, rather than tubing, you will follow a similar process. This type of fix will require a lot more time and patience, and better technique.
It’s much easier to distort the base metal with the heat, so you will need very short bursts and you must allow them to collide between each one.
Keep moving in a circular pattern until it’s fused together properly and fully. Always maintain control over your heat and be constantly moving in short bursts ad circular patterns.
Finish by cleaning it and grinding it down to a smooth bridge.
What do you do if you burn through the gap?
If you have started to burn through your base metal, then you need to correct your technique.
It means you are moving too slowly and not leaving enough time for the metal to cool down between bursts. You may have set your welder too high for the material you are using, too.
To fix this issue, move your torch at a faster pace or try reducing the amp setting on your welder and decreasing the wire feed speed on your welder. You can also try using thinner wire.
You can repair the hole by welding it back together. Just begin on the edge of your hole and move in a circular pattern until you close the hole, then grind it down to be flush again.
Another option for correcting burn-through is to take a TIG filler rod and stick it into the hole. From there, you can spot-weld it with your MIG welding gun.
This will work very quickly to fill the hole, and the TIG rod can also cool the weld so it won’t burn through again as easily.
Final Thoughts…
Have you ever had to MIG weld large gaps? We wish that we could convince everyone to stop doing this type of welding project. We cannot overemphasize that this is not a strong or solid weld.
No matter how good your technique is, these welds are dangerous and rarely hold up against stress testing. It is not a good thing to do.
That being said, if you are going to MIG weld large gaps, then you should do it the right way. Have you used any of the techniques we have mentioned? If so, how did the joint perform over time?
There are several different situations that could require any number of different types of fixes to assure yourself that your gap weld will be strong and not detract from the integrity of your overall project.
Make sure that you employ the right technique. Whether you choose to pad, a backing rod, filler rods, or even flux ods that have had the flux scraped off, you need to observe the techniques properly and take the time to ensure you’re not burning or warping your metal, causing further gaps.
We hope that the things you have learned today will help if you are ever put in the impossible situation of having to MIG weld large gaps between poorly fitted pieces of metal.
Our favorite methods out of all the ones we have mentioned today are to fill the gap using padding or to fill it using a steel backer that can facilitate a smoother transition and lend strength to your finished weld.